Memory Pillow from a Toddler Jacket
Using outgrown clothes to make sentimental memory items is not new by any means, and over the years I have seen so many projects to use baby and toddler clothes. I love making quilts out of baby clothes and have done that for a long time to preserve the memories of my favorite outfits.
When you have a piece of clothing that has a cute memory, but it is spread out over a zipper, it can be very difficult to include it in a upcycled clothing quilt. We still want to save this memory and make something functional, so using toddler jackets to make memory pillows is a perfect useful project!
Supplies Needed for a Clothing Memory Pillow
The supplies needed are very few for this project. We will of course need a sewing machine and thread, but the only additional things we need is a pillow insert.
If you don’t have a pillow insert, you can also use an existing pillow, stuff with batting and fabric scraps, or similar to our “How to Fix Faded Outdoor Cushions on your Porch“, you can buy a super cheap pillow at a thrift store.
Super Simple Tutorial for a Clothing Memory Pillow
This tutorial is very simple but has a few key points that make all the difference!
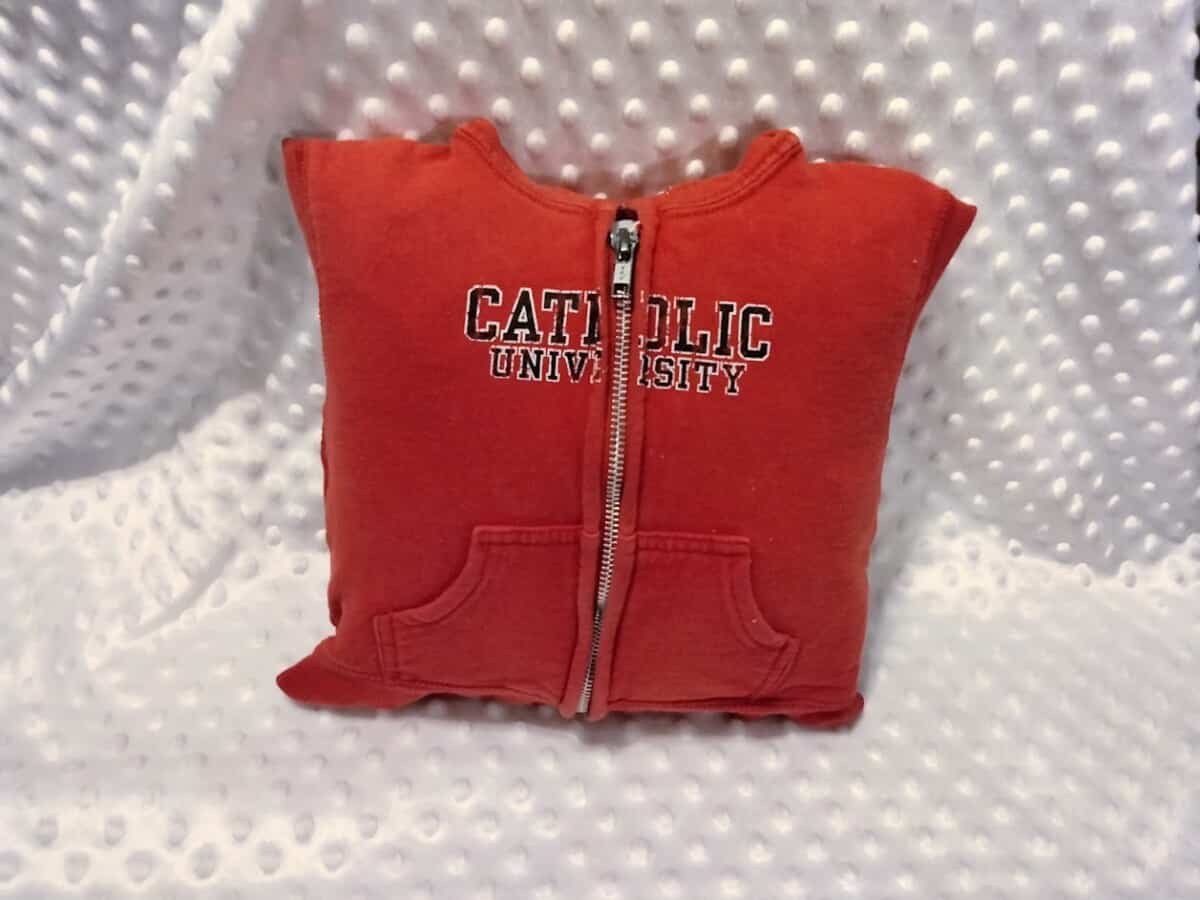
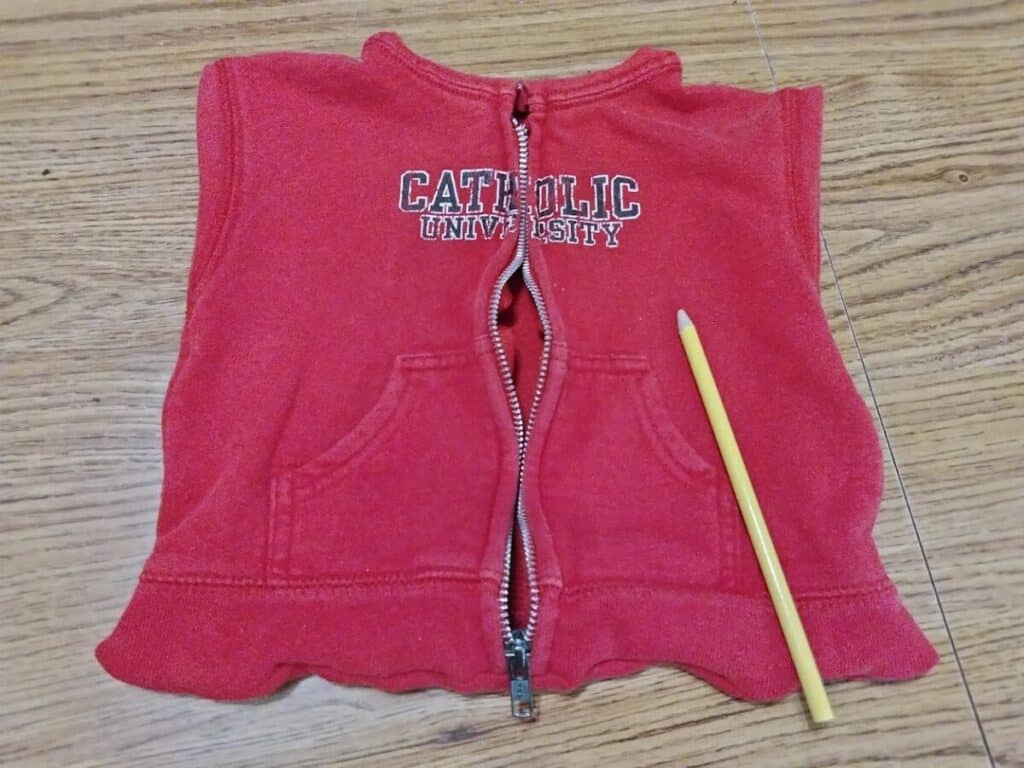
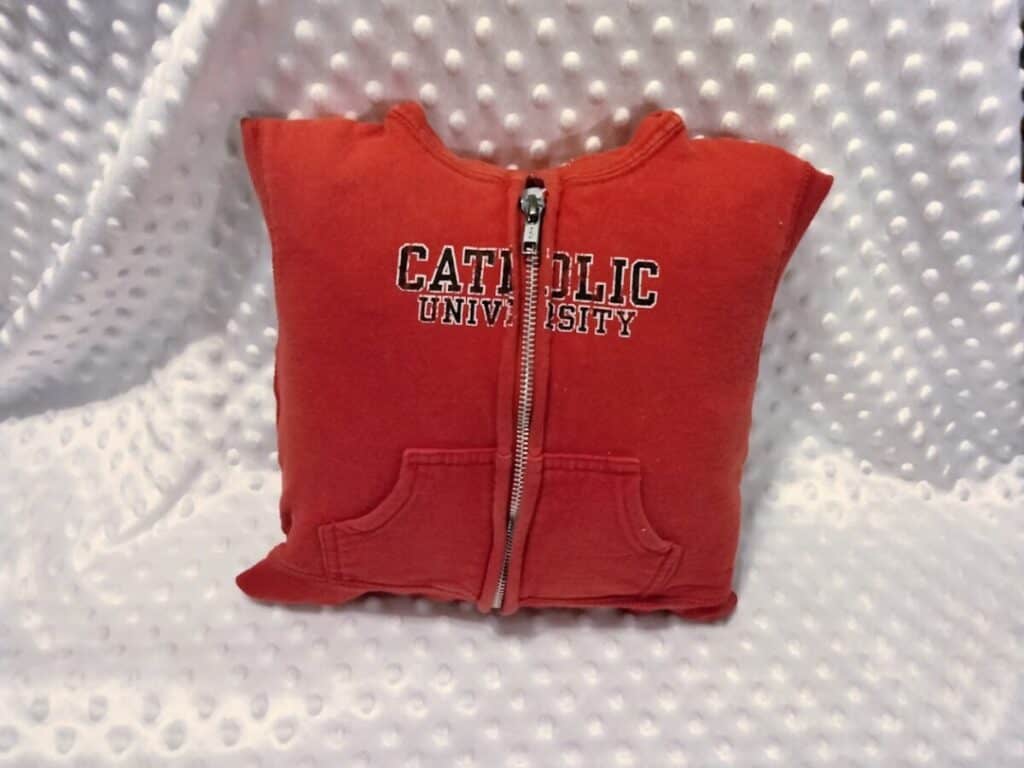
The first step is finding the perfect size pillow insert. For this project I am using a friend’s toddler jacket to make a pillow. It is a very sentimental item for their family, and they wanted a functional piece like a throw pillow.
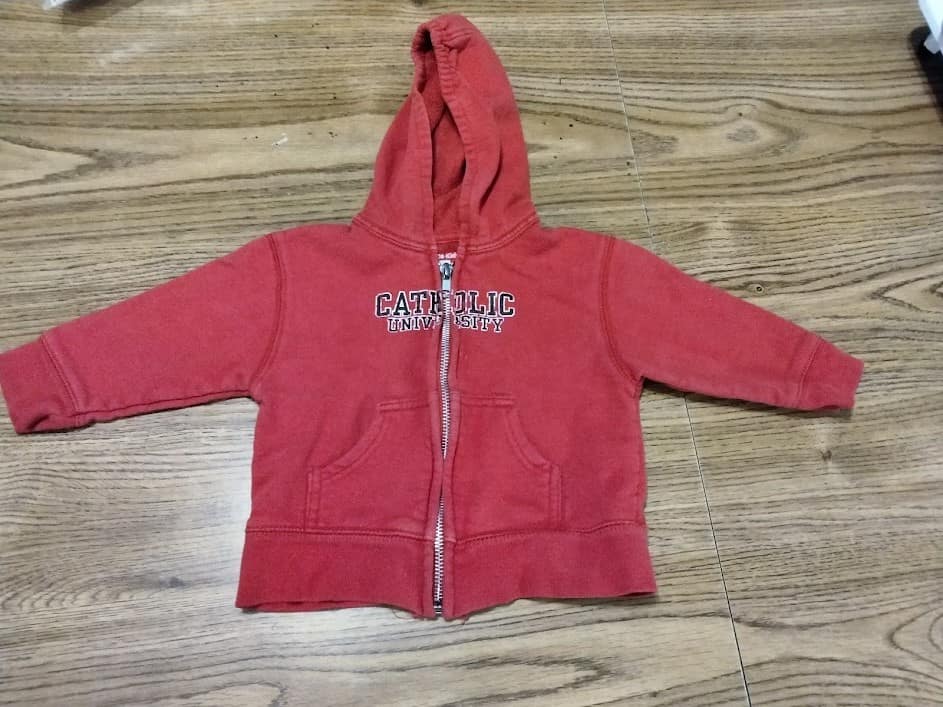
To measure the clothing for a pillow insert, I measured from armpit to armpit and that was 12 inches, so I looked for a 12 inch pillow.
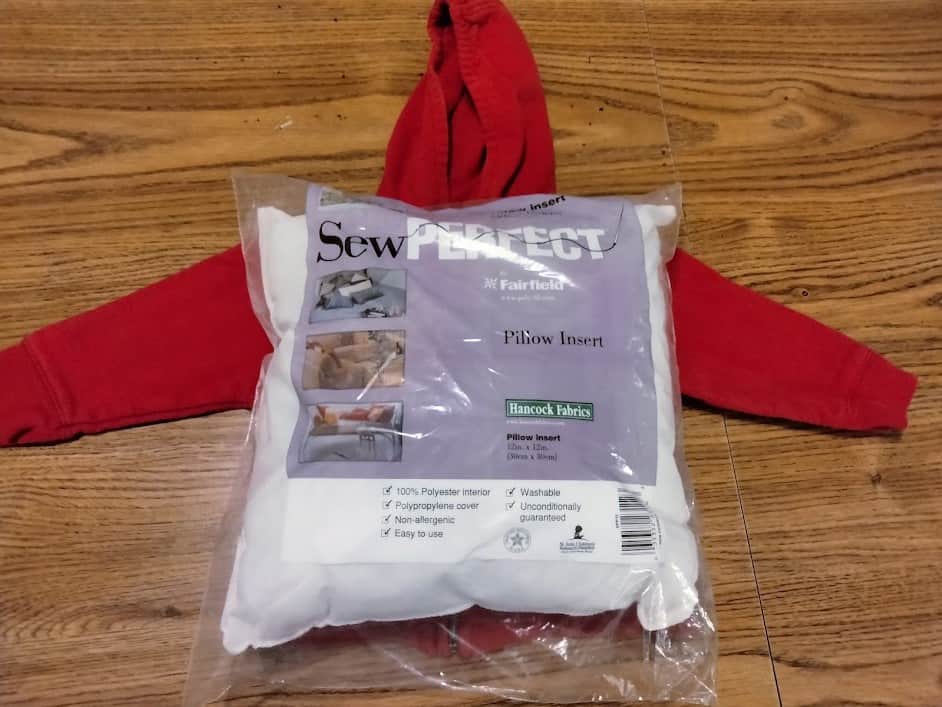
I actually had this pillow insert in my craft closet from a long time ago project, so you can see it came from Hancock Fabrics and they closed like 10 years ago.
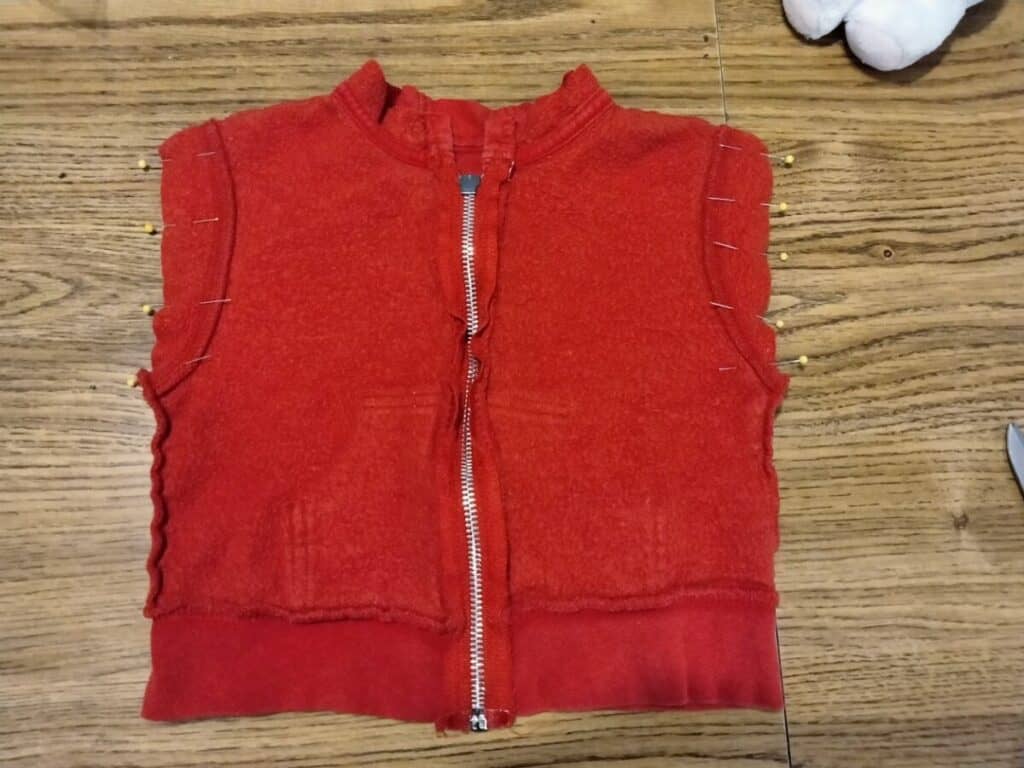
Now comes the cutting part. We need to remember that our goal is to end up with an approximately 12 inch square pillow cover.
I turned the jacket inside out, so I could really see the existing seams. Whenever possible I like to work with the existing seams not against them.

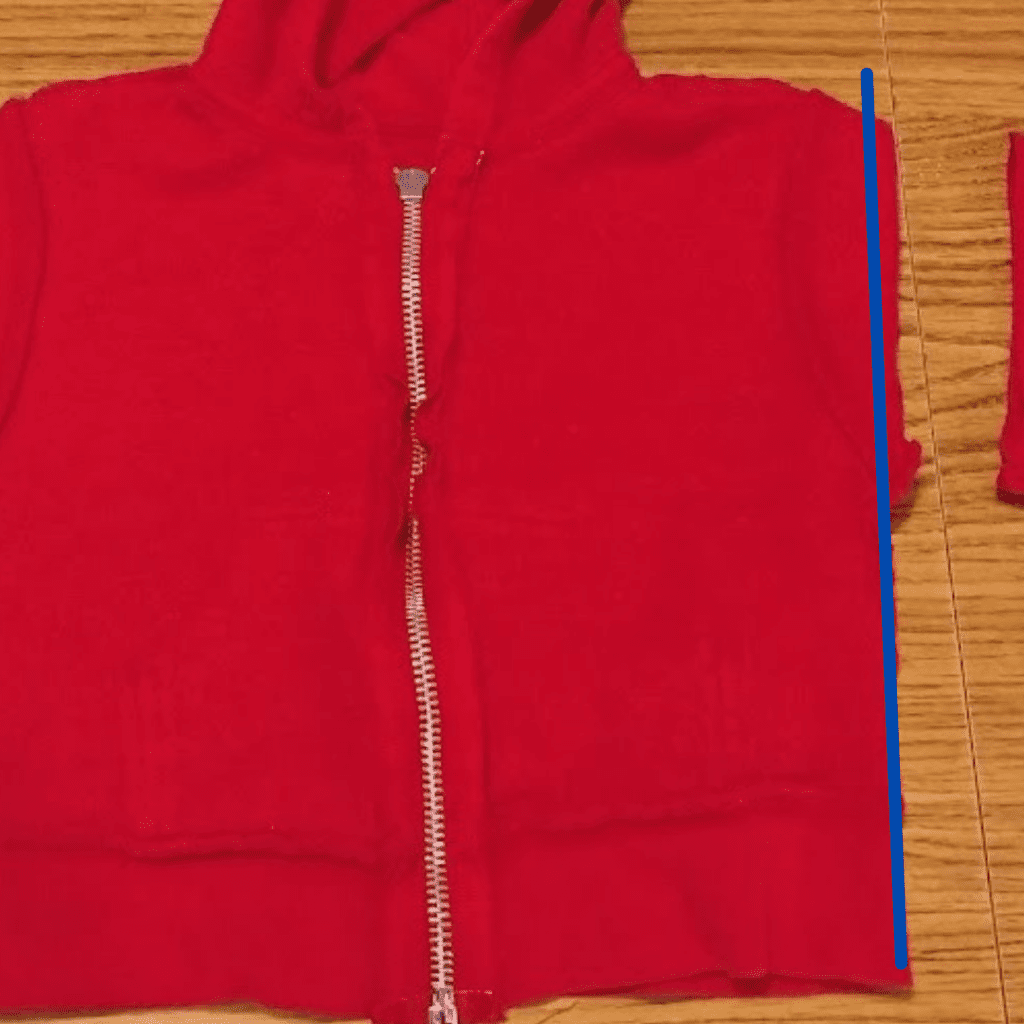
Next, I will remove the sleeves. I want to continue the seam that goes up the sides of the jacket, so I am cutting straight up the sleeves but leaving about a 1/4 extra for seam allowance. See the next picture for a better idea. The blue line shows where I want our sewing seam to continue, so I cut the sleeve off at about a 1/4 of inch over to allow room to sew.
If your cutting edges are not perfect that is totally ok, because no one will see the inside of the pillow cover. I am not a 100% perfect sewist at all, but I do think of myself as a “Functional Sewist” meaning that it won’t follow apart and it totally works!
Ok, next we need to get rid of the hood. Using the same principle that I used on the sleeves, I want to make sure to leave room to sew the top together. Around the top of the neck is a very thick seam that will be hard to sew through, so I decided to sew above that seam.

I sewed this pillow in 3 separate sections, the first was the arm holes. Using pins about every 1-2 inches to keep my line straight. This material does have some stretch in it, so the more pins that better! I like to sew completely past the edge of the clothing at the shoulders, so I have a nice and neat point at the top for my corner. I sewed down into the side seam at the sides so that it looks like it is all part of the same seam.
After the arm holes are sewed, we will be working on the neck opening. I want to sew along the curve of the neck and also bring the two sides together. I sewed across the neck opening in one pass. Then, I went back and sewed across the two sides coming together. I went back and forth over this opening multiple times to strengthen it so it wouldn’t pull apart.
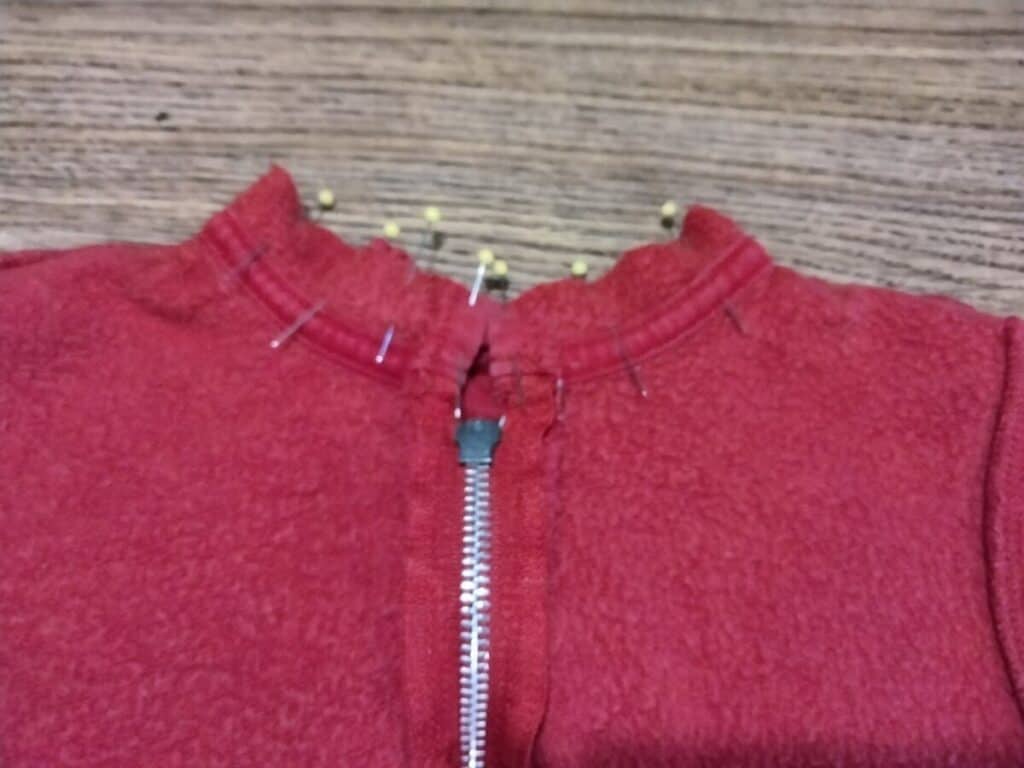
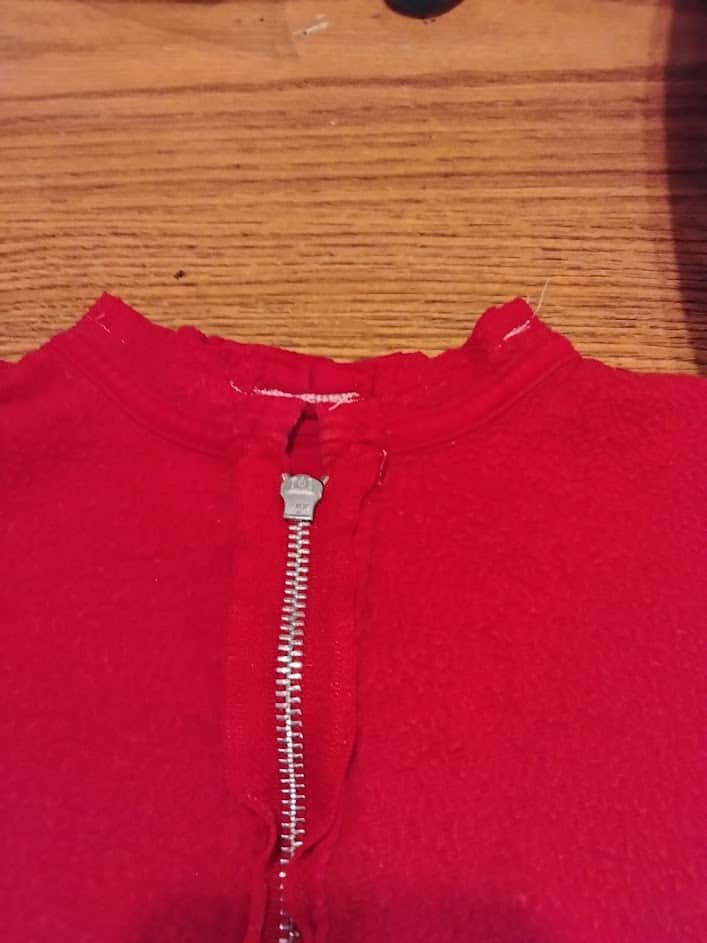
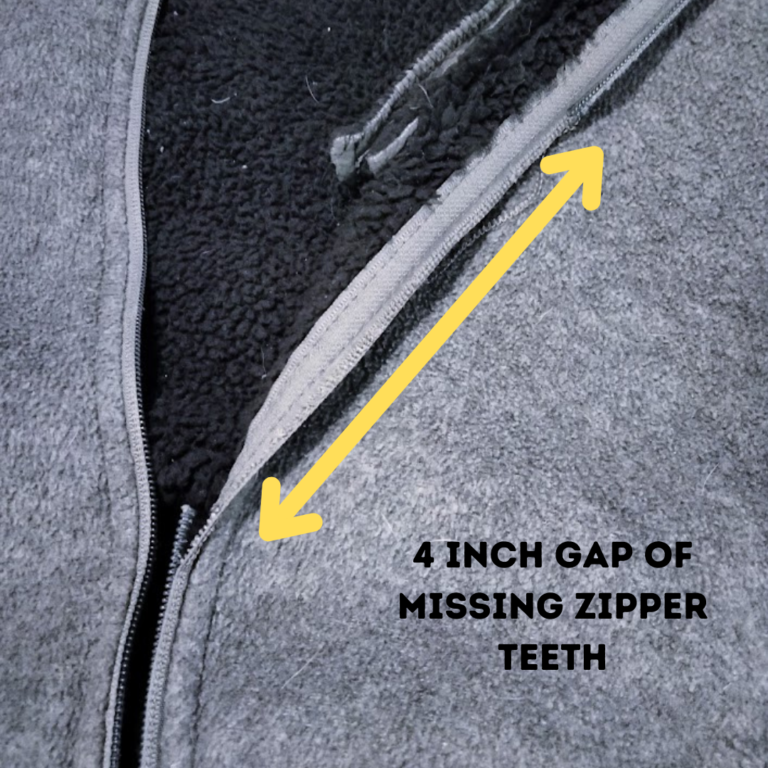
There will be a tiny gap from the top of the zipper to where the two edges meet, but it will be barely noticeable. (If you do not want this opening, you can “patch” it with some of the fabric from the hood or the sleeves)
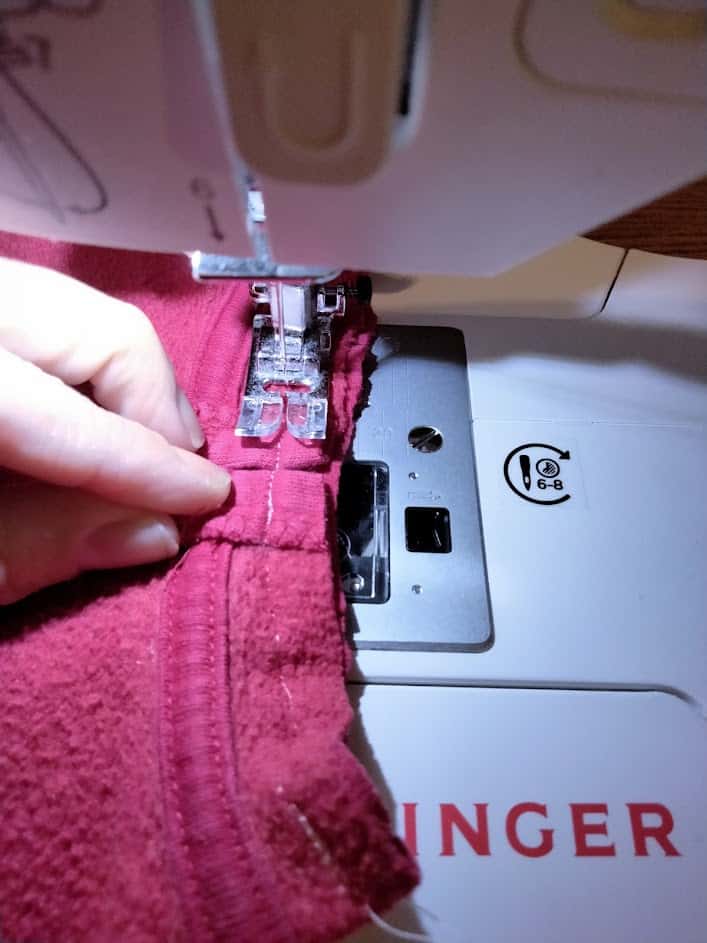
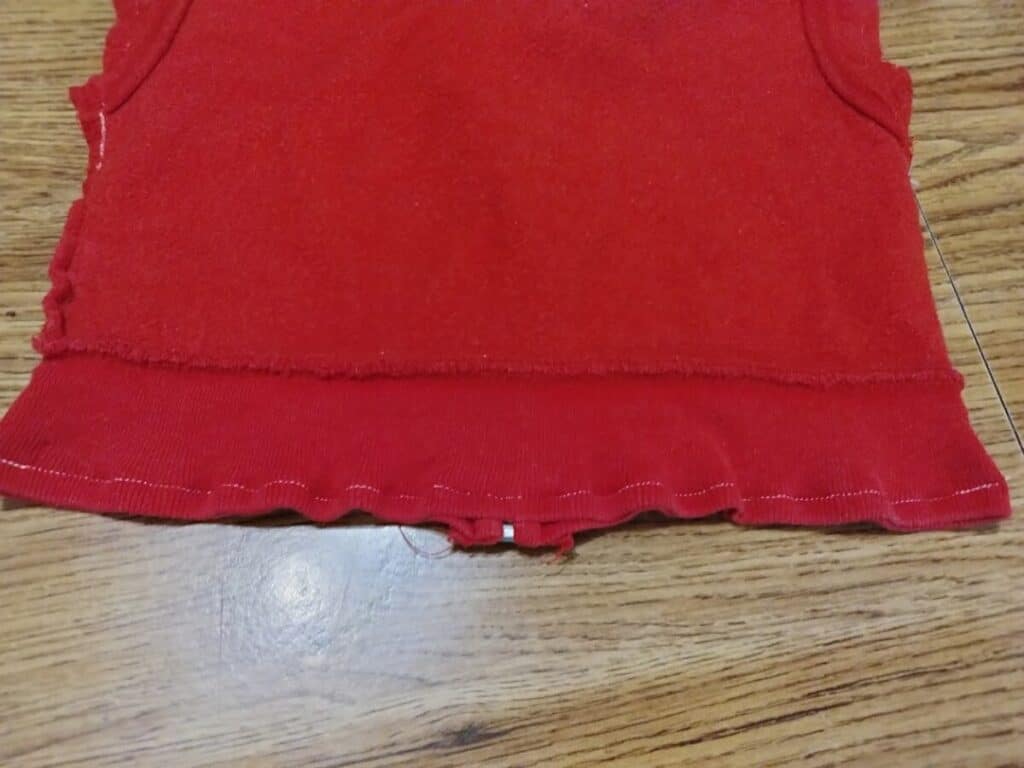
Next, we need to sew the bottom of the jacket. *****Before you sew the bottom- make sure to put the zipper down to halfway**** If you skip this step, you may not be able to open the zipper after you sew.
I pinned along the bottom and sewed across as straight as I could. The stretchy bottom wants to twist a little bit so just go slow and it will all be good! Try to make sure you sew above where the metal connector of the zipper is, so you don’t jam or break your needle.
If your machine does not want to sew over the zipper teeth, you can manually move the needle through the zipper. Plastic zippers don’t ever give me trouble, but these zippers with metal teeth sometimes do give me some issues.
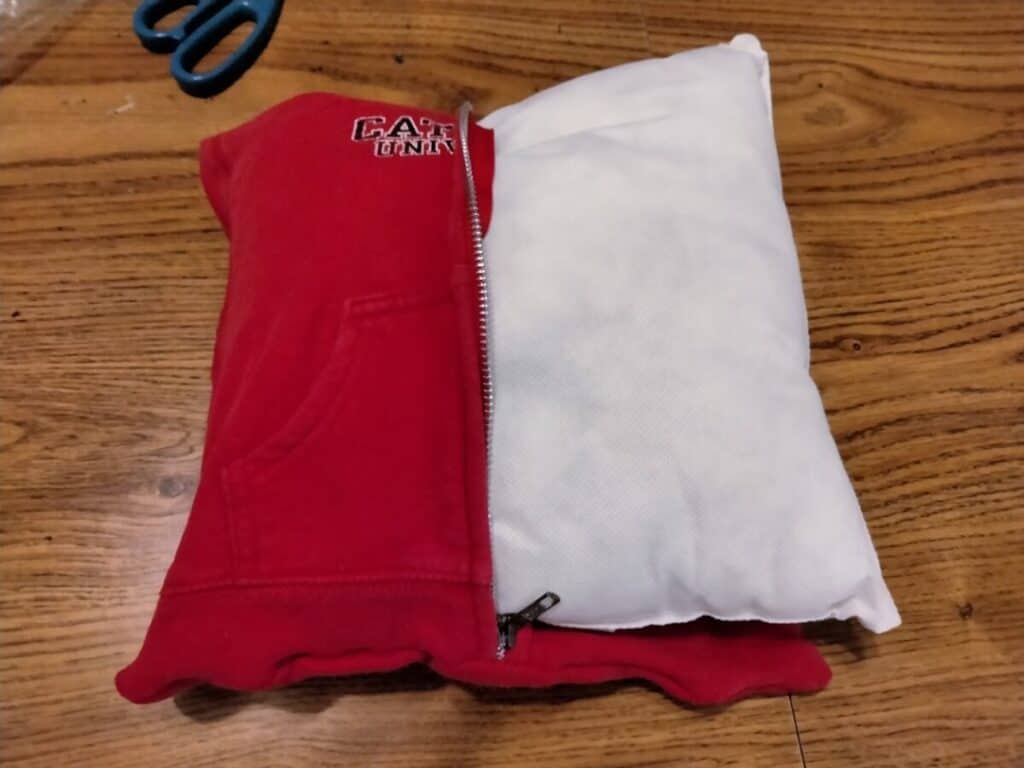
Now that we have our four sides sewn, it is time to turn the pillow right side out. I opened up the zipper all the way and pulled the corners in to flip it out. I also used my favorite corner poking tool (aka dull colored pencil) to push my corners out to nice points.
Once your pillow cover is right side out and your corners are nice, then you can stuff the pillow insert into the opening. The pillow may look huge compared to the cover, but you should be able to squish the insert into the opening with ease.
Now after your pillow insert is in place, you can zip up the zipper to close the pillow. Since we used a toddler jacket with no special cleaning requirements, this pillow can be unzipped and the cover tossed in the washing machine.
I am a huge fan of being able to wash anything in the washing machine. If this pillow gets a stain or gets dusty, it will be very easy to clean!
This project was so fun to take a sentimental piece of clothing that was too small to wear and to make it a functional piece. Now my friend can use it as a throw pillow and see her special memories every day, instead of having a jacket sit in a box unused.
This project concept can be used for any zipper jacket from child size to adult size. The hardest part is just finding a pillow insert that will fit.
Happy Upcycling!