Do It Yourself Stuffed Animal Repair
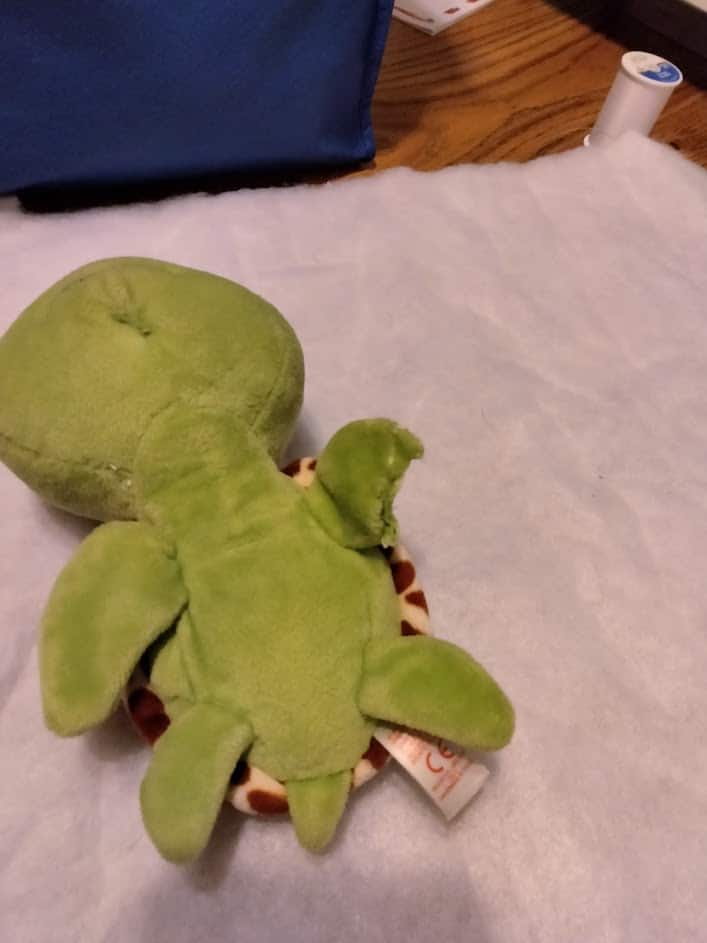
Sometimes being a parent means that you need to learn skills that you never knew existed. My oldest son is now 5 years old, and in that time I feel that I have earned my Toy Surgeon License. I have repaired a great number of boo-boos and ouchies that have afflicted various stuffed animals. My earliest skills as a budding toy surgeon were not impressive but they did get the job done. See the picture of this mangled hand on a turtle that was repaired early in my toy surgeon career. It is not pretty, but it is still holding years later!
Next time your child has a stuffed animal in desperate need of repair, consider doing it yourself! Most replacement parts and cosmetic damage to soft fabric toys can be fixed very easily! In general, most repairs require just a needle and thread.
Patient: Slothy has an almost Complete Arm Amputation
Poor Slothy became demaged in a full out tug of war between two toddlers. His left arm was badly torn and barely hanging on. My son was distraught and feared the worst, that his beloved friend would lose his arm. I asked my son to give Slothy a pep talk and a kiss for good luck before going into surgery.

Items needed for Torn Arm/Limb Repair
This type of surgery is pretty easy and just required a needle and thread. I prefer to use a larger needle with a large eye opening for hand sewing. I also like to sew with double thread thickness to add more durability to my repair.
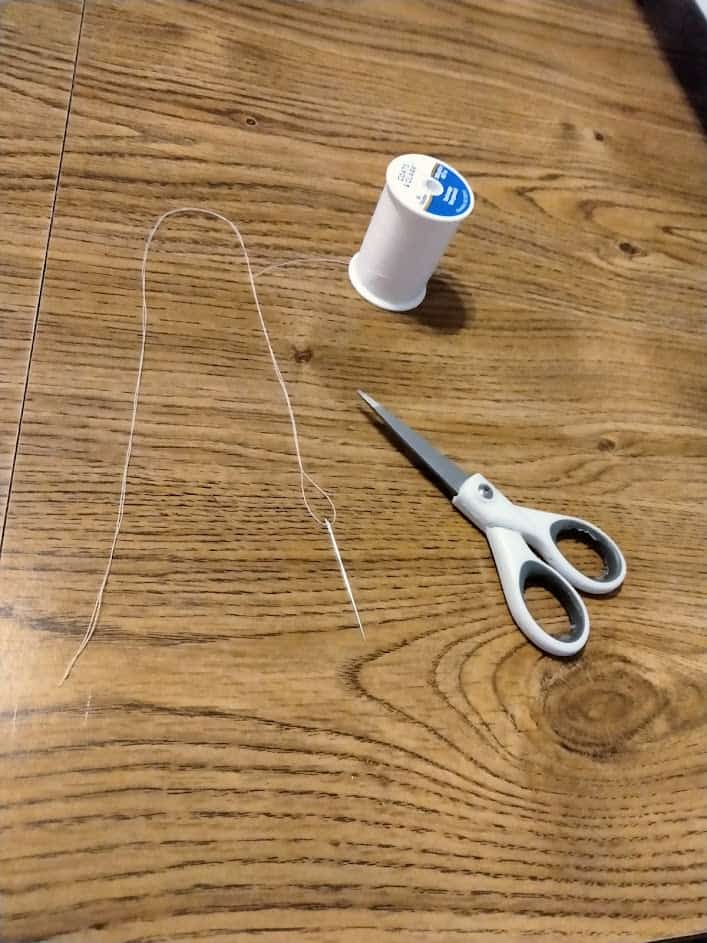
Pro Tip: If the animal is fluffy in nature the color of the thread doesn’t really matter. If it has a suede or matte texture, I try for a somewhat close match in thread color
Steps to Repair a Torn Arm (or leg) on a Stuffed Animal
First, I always want to make note of any other repairs that may also need to be taken care of at the same time. It is much easier to fix a tiny hole or tear before it becomes a gigantic gaping wound.
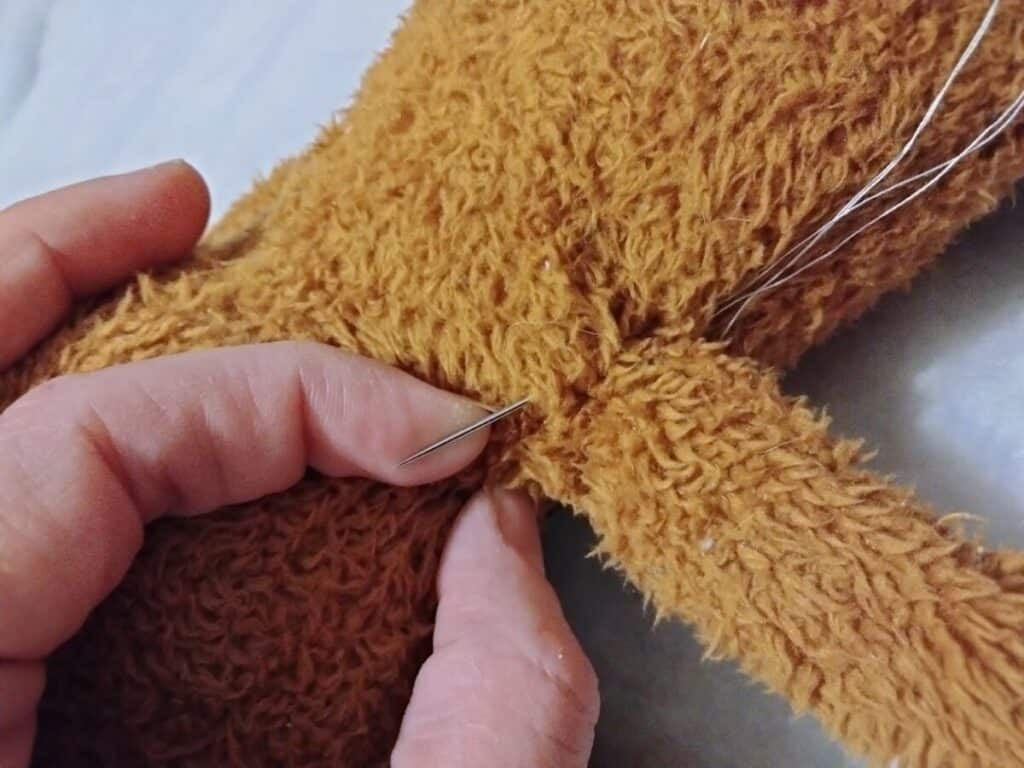
1. This Sloth’s arm was almost completely torn off but had about 10% of the limb still holding on. For this repair I knew it would be relatively easy to resecure the arm using a ladder type stitch. (a ladder stitch is super easy and looks like straight stitches that go across an opening)
The trick to a ladder stitch to close an opening is to start your needle underneath the part of the animal that you can see, so the knot on your thread is hidden inside the animal.
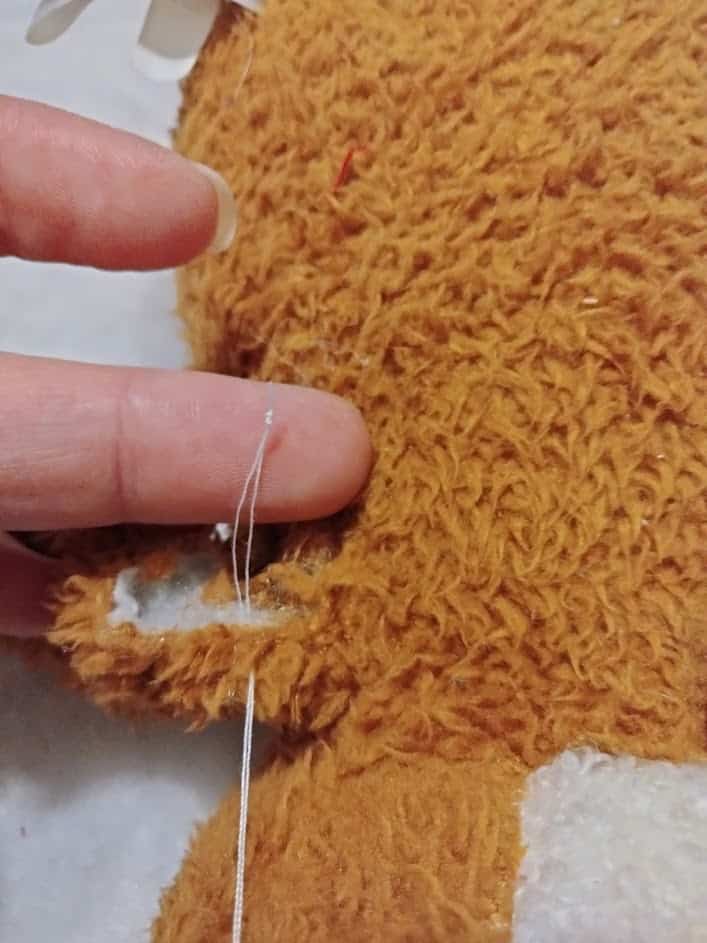
2. Now that our knot is buried inside the opening, we will make stitches left to right in a repeating pattern. Your instinct will be to pull the thread closed after each stitch, but that will obscure your field of vision.
Make 2-3 stitches across the opening by securing your thread to the part of the animal fabric that is not torn or weak. I like to go about 1/8 to 1/4 inch away from the gap so that way I am attaching to good strong fabric and not frayed bits that may tear again later.
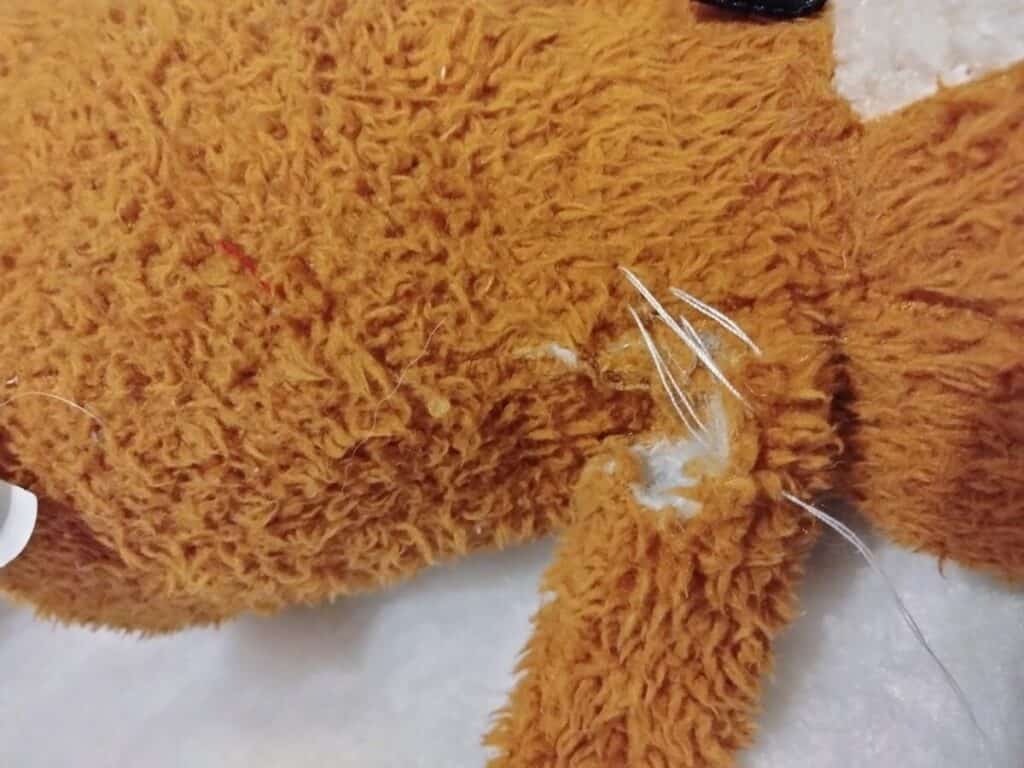
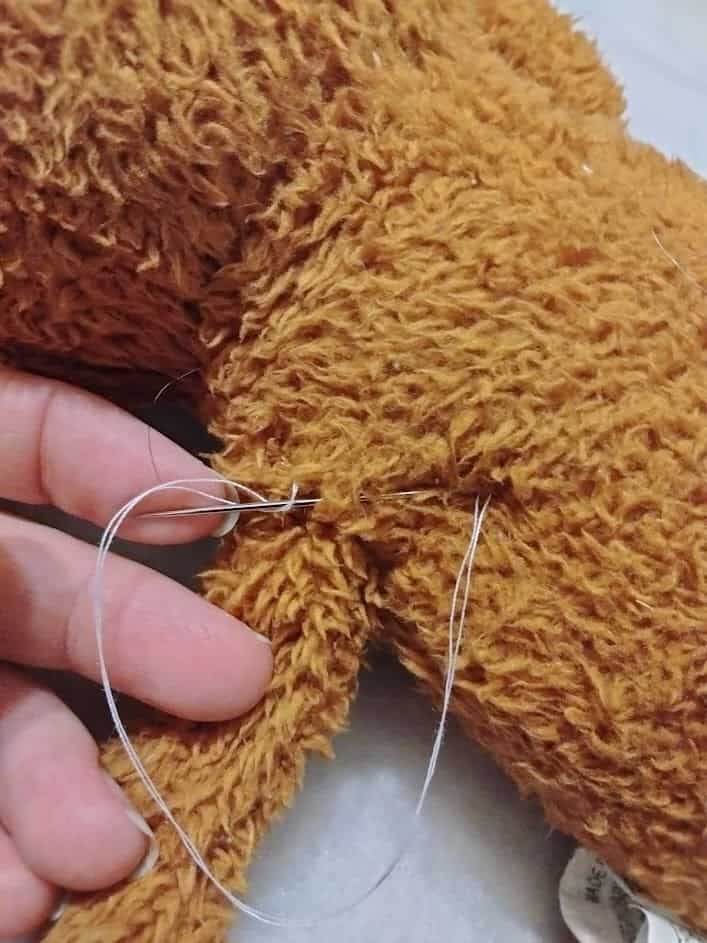
Once you have a couple stiches you can gently pull thread nearest to the needle and it will completely close the opening without showing the stitches!
I will keep repeating this process until I have secured the limb back in place. Since this arm was almost completely torn off, I had to go all the way up one side of the armpit and then back down the other side to make sure the arm was completely reattached.

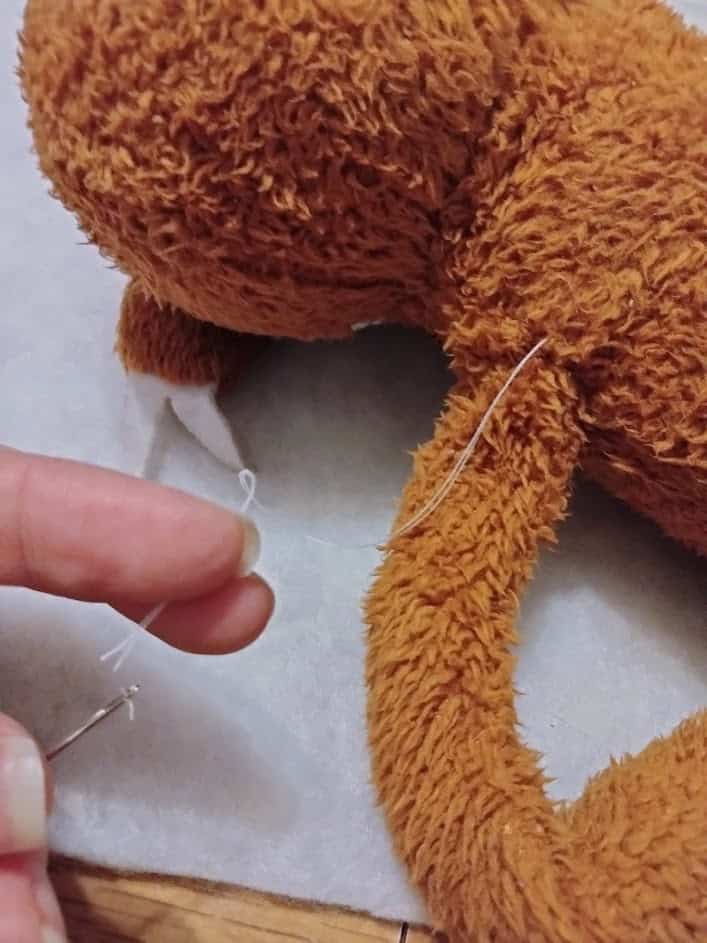
3. Once the gap or opening is completely closed, I have found the best way to end my repair is to weave the needle back up through the fur away from a joint.
In this case I weaved the needle 3 to 4 times up from the Sloth’s armpit towards that top of his shoulder.
I know it sounds backwards, but I have found that you want to end your stitches away from a spot that may tear again. In this case the armpit would be moved a lot more than the top of the shoulder. The shoulder would have less tension.
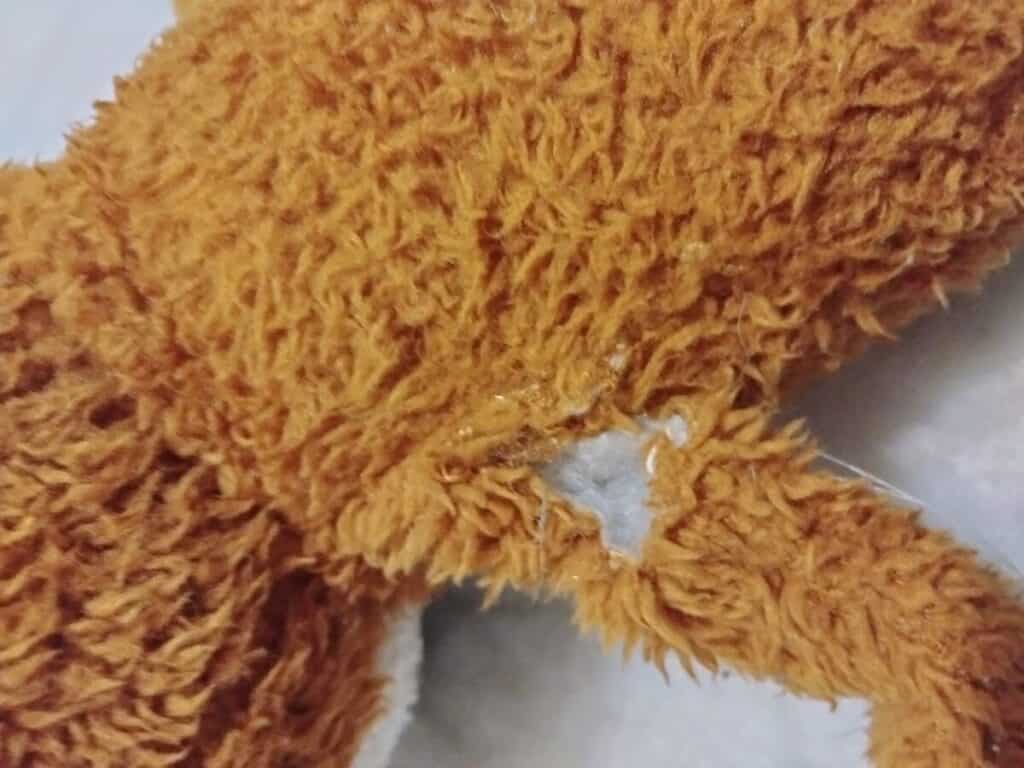
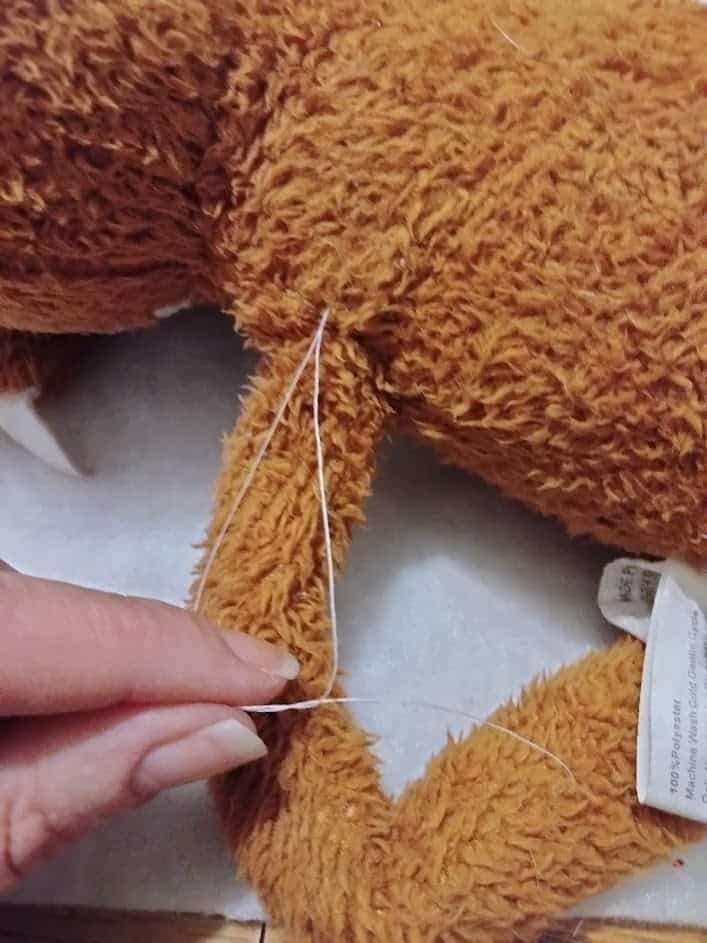
4. To end the stitches, I make one final weave of the needle into good strong fur, and make an easy knot.
Then you can pull the needle through, and you will have an easy basic knot.
I am all about not having to repair the same tear twice, so I cut the thread near the needle so I have plenty of thread to work with to make a few more knots.
I separate the 2 strands of thread and make 3 quick knots as tight as I can. Then after my extra knots I will trim the excess thread pretty close to the knots but leaving about 1/4 of thread.
Don’t cut too close and accidently cut the knot! Then you will have to start over again because your stitches will eventually unravel when the toy is played with.
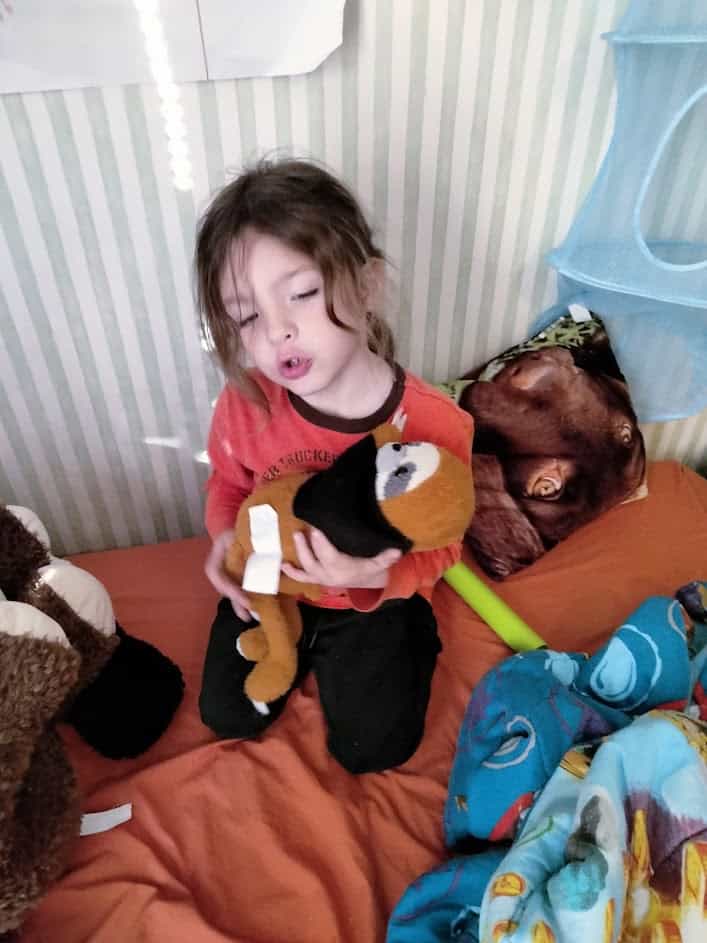
5. Now my kids are still very young, and they believe that the stuffed animal feels pain when he was injured. So, I went the extra mile to use a scrap piece of fabric to fashion a small sling.
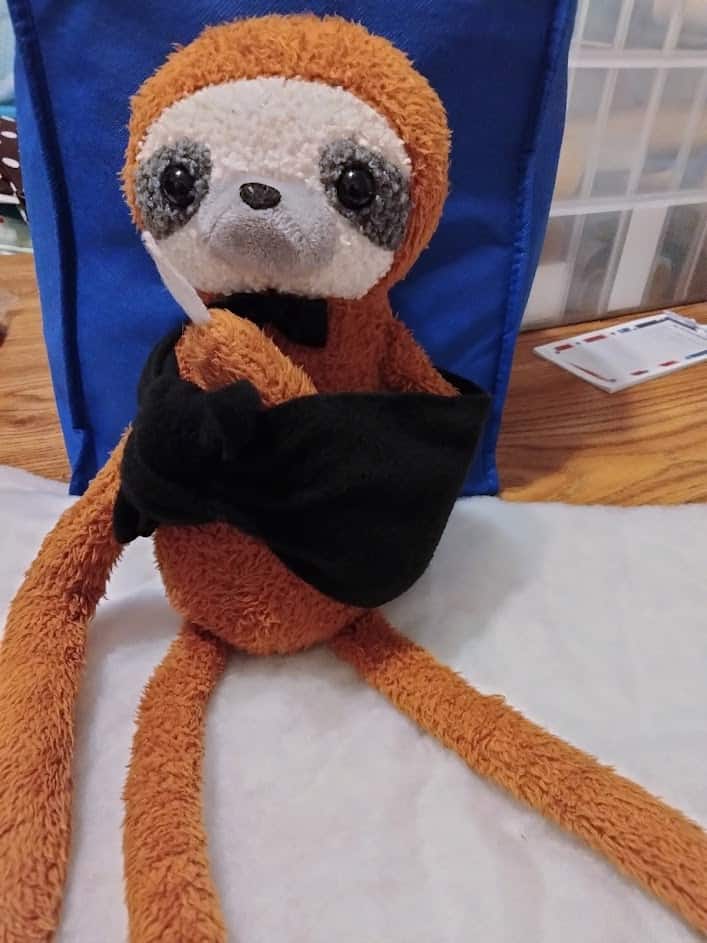
After giving the good news that Slothy made it through surgery and got to keep his arm, my son promptly put him to bed. We discussed proper post-surgery care and I explained that Slothy will not want to play tug of war anymore. My son agreed to keep Slothy from future harm and all was well again.
How do you Fix a Torn Stuffed Animal without Sewing?
If you do not have access to a needle and thread and still want to repair a stuffed animal, it is possible to fix with some glues.
- Hot Glue Gun– If it is a relatively small hole or tear, you can use hot glue to close the opening. Keep in mind that hot glue is very hot and will burn your fingers, so this may be easier if you have someone to hold the stuffed animal for you. You would want to gently open the hole wider so you can put a small amount of glue on the inside and then squeeze the opening closed after you put the glue in. Just remember that hot glue does dry hard sometimes, so this may not be a good option if the repair is in a spot that is cuddled with often.
- Aleene’s Fabric Fusion Glue– This is a heavy duty no-odor fabric glue that can be used on almost any kind of fabric. It can be found here at JoAnn’s for relatively cheap. The great thing about this adhesive is that it bonds very well but also remains flexible. It also will hold up to washing and drying! The glue is clear and dries clear as well but be careful when applying it that you don’t get it all over the place. Once it is on, it will be impossible to get off unless you cut the glue out or your stuffed animal fur.
Other Common Repairs associated with Stuffed Animals
I would have to say that in these first few years we have mostly seen small tears and torn limbs with our stuffed animals. We have come across a few other cosmetic issues that had to be addressed.
- Missing Eyeballs- If you have an eyeball that is hanging out, very loose, or completely missing you can replace them very easily. I have found that trying to buy replacement eyes on Amazon is easy to find but they are usually sold in huge amounts. So, unless you think you will have lots of eyes to replace later on, I would try your local craft store. Here are some replacement eyes available at Joann’s. They come in a few different sizes, so I just take the bear with me to the store and do a visual comparison to find the right size.
- Missing Nose- Similar to eyeballs, noses also get loose or go missing. Here are some replacement noses available at Joann’s. Typically, these come in one size but have color options of black and brown.
- Missing or Broken Squeakers- I have found that squeakers in baby toys are exactly the same as dog toys! So just buy a bag of replacement squeakers and your toys will be working in no time. (Our dogs love to see how quickly they can kill squeakers, so I tend to put 2-3 new squeakers in at time to make the toy last longer.) These are almost always cheaper on Amazon, check them out Low Cost Stuffed Animal Repair
It always amazes me how many ouchies stuffed animals can get over their lifetime. Maybe it’s just boys that are rough on stuffed animals?
I can only imagine the full cost amount of replacement stuffed animals I would have had to purchase, if I didn’t repair them myself.
I know some people like to buy a “backup” stuffed animal for their child’s favorite toy, but sometimes today’s favorite is not next week’s favorite toy.
Even if your repair is obvious or messy, just know that your kids will thank you for fixing their friend. I have never been told that my surgery efforts were not good enough.
The important part to your child, is that you cared enough to fix their loved one and at the end of the day I just want my kid smiling again!
For more tutorials on easy repairs, check out “How to Fix Faded Outdoor Cushions on your Porch“. The fix is way easier than you think!