How to Make a Memorial Christmas Stocking
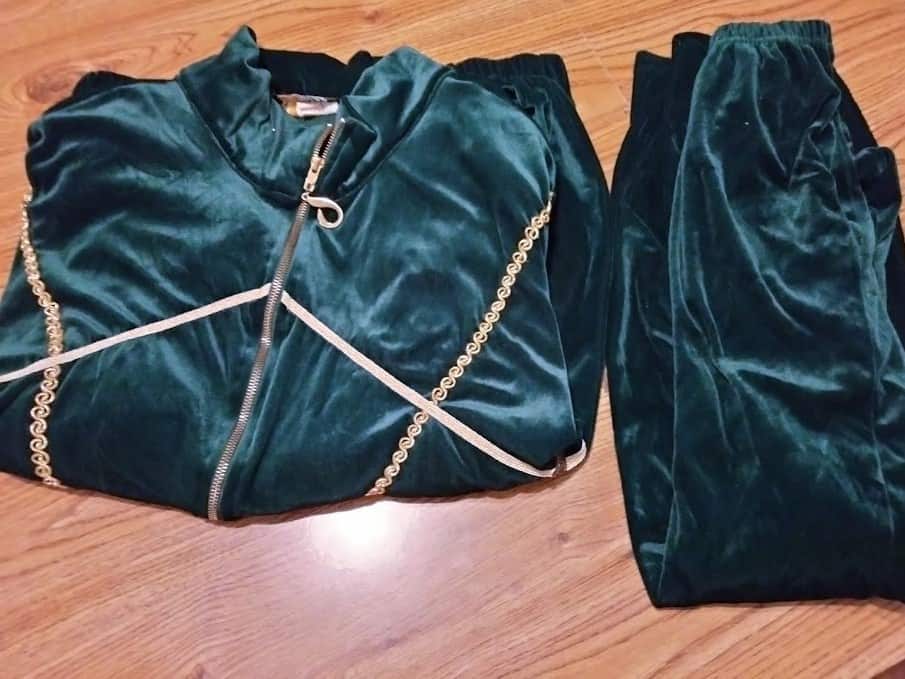
A friend of mine’s mother recently passed away, and she asked me if there was anything Christmas related that we could do with her mom’s clothes. Her mom was a huge fan of Christmas and went all out when she decorated. She also wore this super comfortable dark green velour tracksuit every year around the holidays.
The ultimate Christmas decoration beside the tree has to be the Christmas Stocking. They hang up in the middle of the room for all to see! We decided to take her mom’s track suit and make them into Christmas Stockings. Now her mom’s memory can be included for the holidays every year.
We will be using the entire jacket to make 2 stockings with cuffs, so the only additional fabric that we need is for the lining. I typically use a very basic white cotton for the lining and you will need just under a yard to complete this project.
What to do with Stretchy Fabric
When your making Memorial Christmas Stockings out of clothing items, the first thing you need to decide is if the clothing is stretchy. In this project, the velour fabric is very stretchy and difficult to sew when it moves and shifts. We will use interfacing that is ironed on to the clothing, to make it easier to cut and to sew.
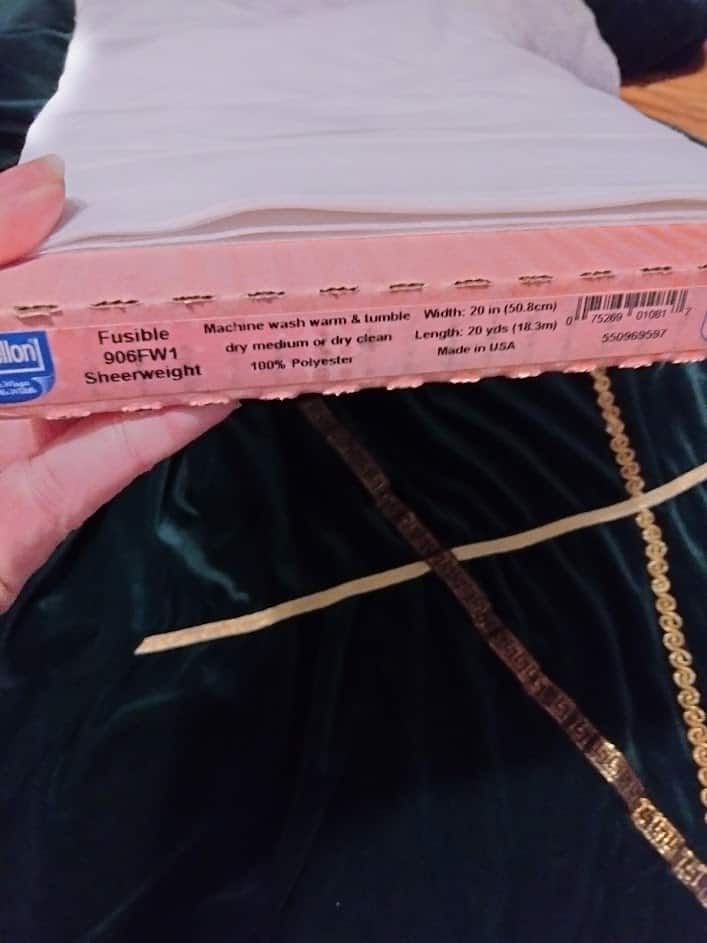
I love to use Pellon 906F Sheerweight interfacing because it doesn’t add a lot of bulk to the clothing. I do a lot of projects involving clothing so I buy it by the bolt, but you can buy it by the yard at any fabric or craft store.
Pro Tip: Interfacing goes on sale regularly at Joann’s and when it is not on sale, use one of their store coupons for 40% off!
How to make your own Christmas Stocking Pattern
Over the years, I have tried many online patterns for Christmas Stockings and I wasn’t a fan of the way most of them are put together. I like to sew as efficiently as possible, so I created a really easy method to make lined Christmas Stockings.
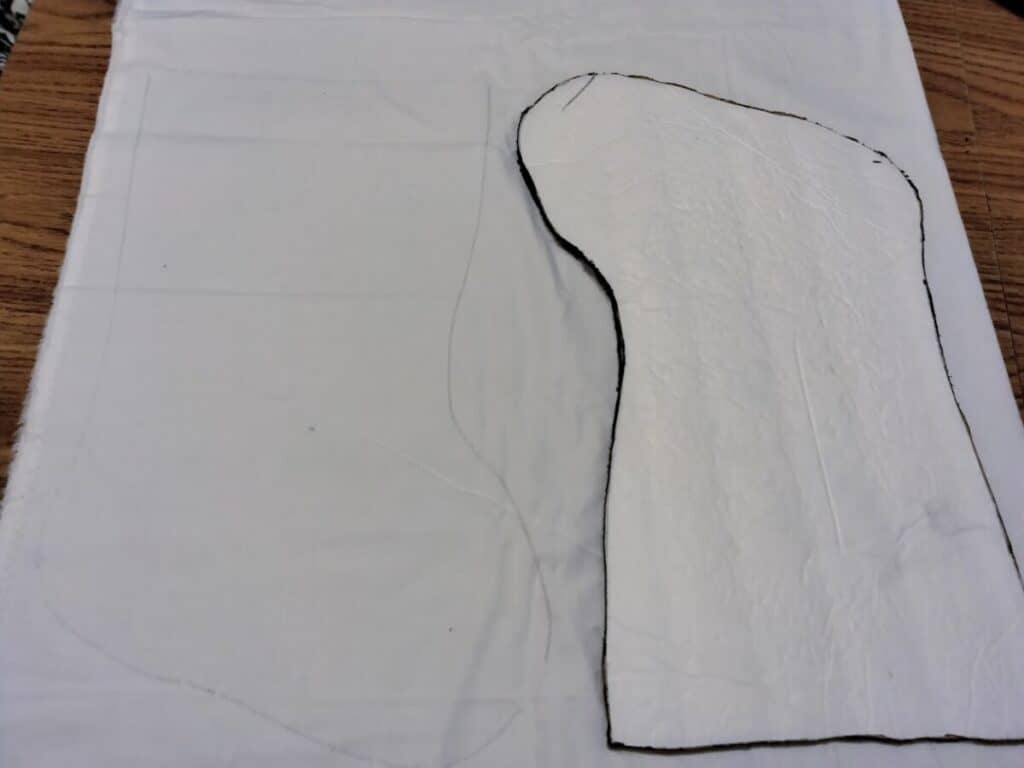
An easy way to make a pattern for a stocking is to find a cheap stocking that you like the size of and use that as your guide.
For my pattern, I used a $1 stocking from the Dollar Tree. The size was perfect for me and all I had to do was use a seam ripper to take it apart. I then traced around the stocking onto a piece of foam core to have an easy-to-use pattern over and over again. (I bought the foam core from the Dollar tree as well).
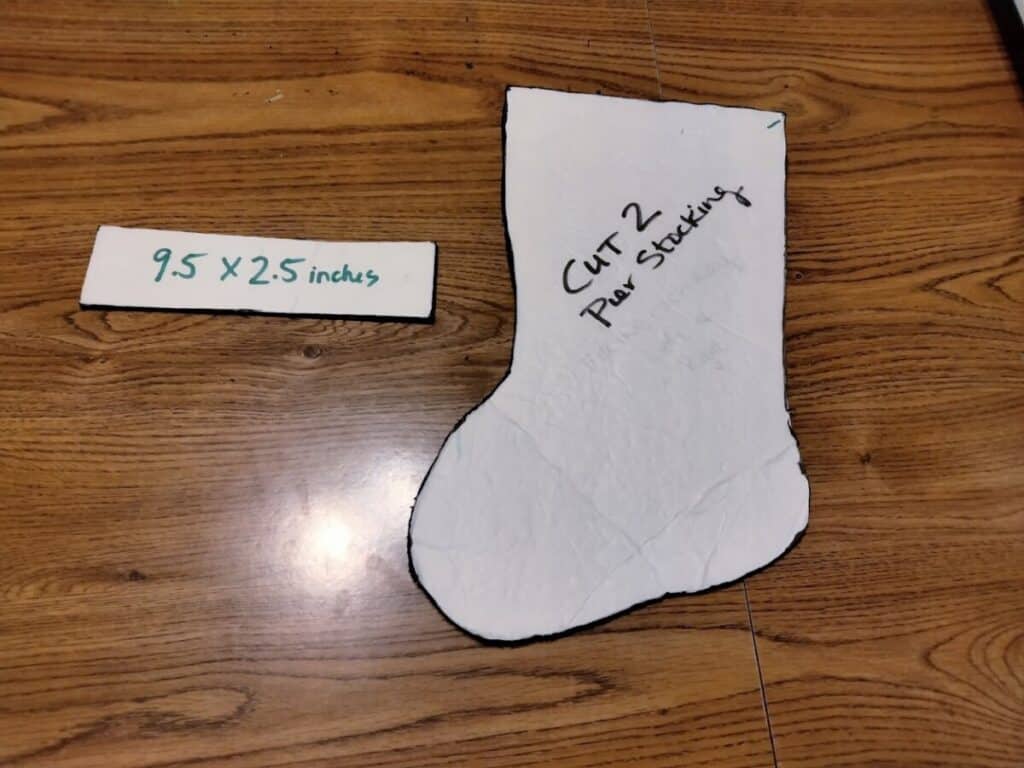
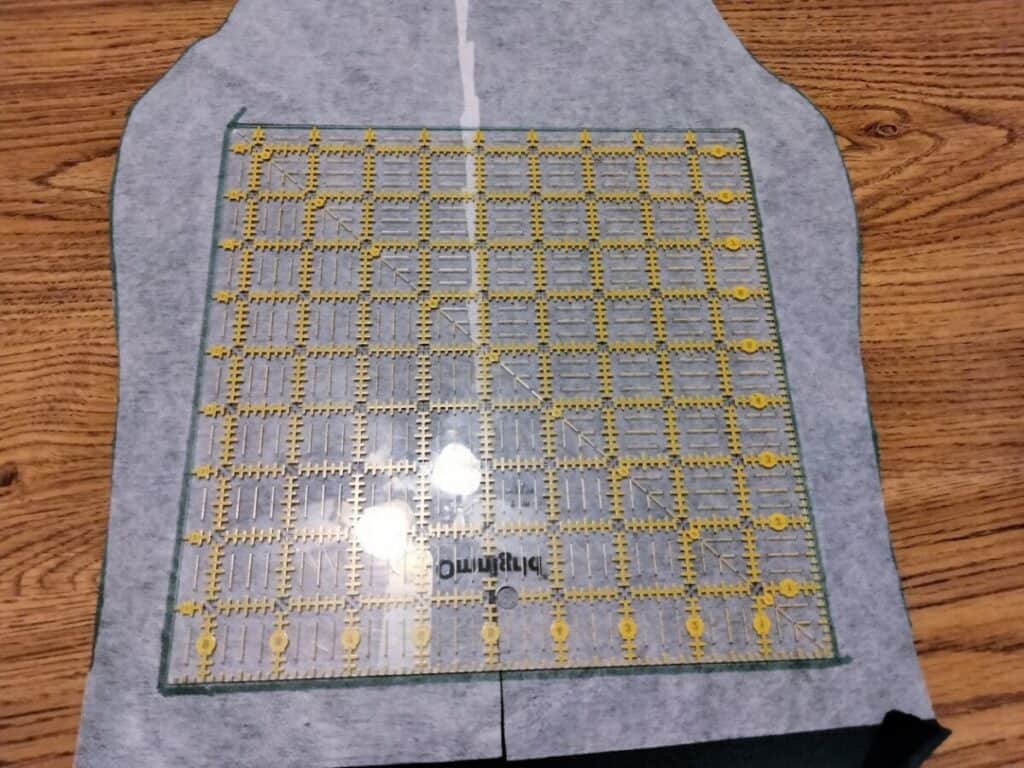
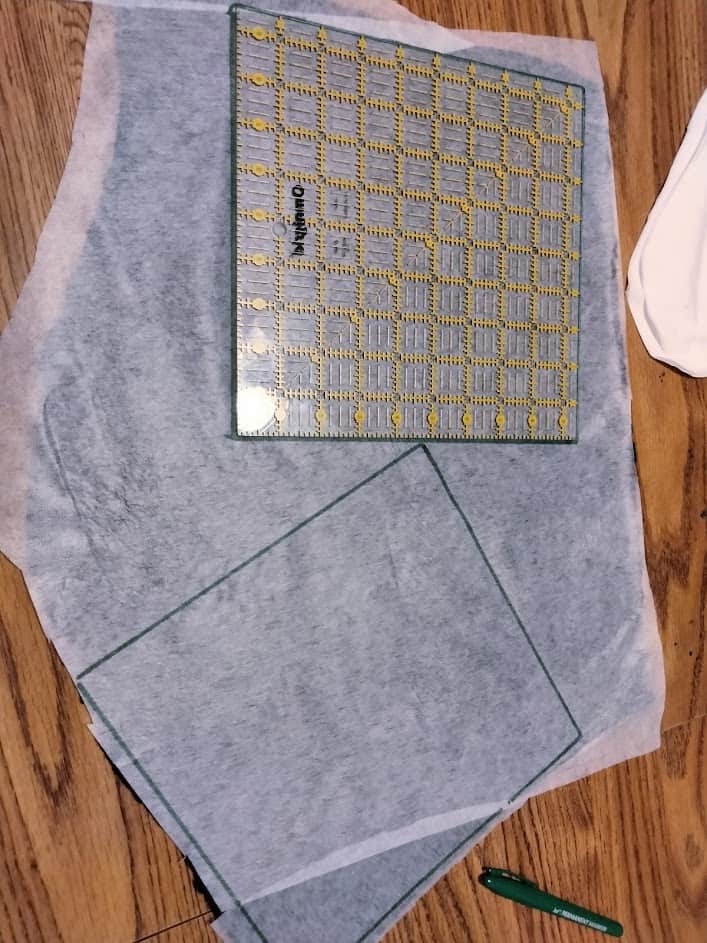
Once you have the body of the stocking pattern piece made you just need to measure across the top to see how wide your stocking cuff will need to be. The top of my stocking is about 9 inches across, so I use a 9.5 inch quilting square to make my cuff pieces.
It’s okay if the cuff is wider than the stocking because you won’t be able to tell when it is put together!
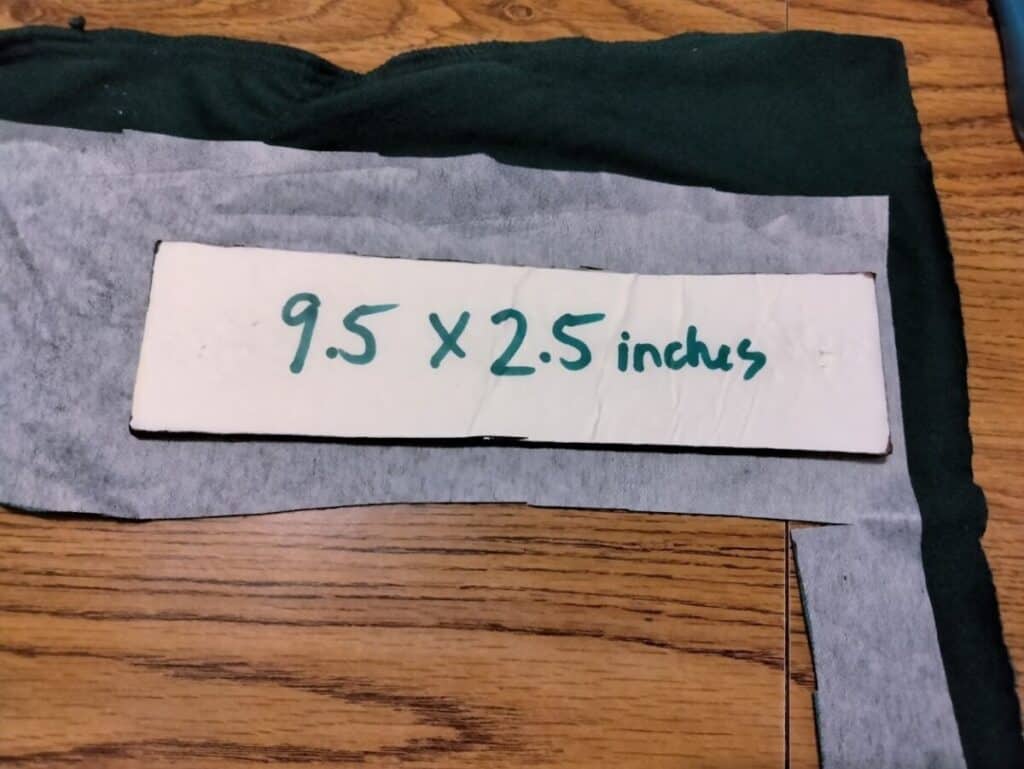
For the handle to hang the stockings, I use a very basic pattern that measures 9.5 by 2.5 inches in a rectangle shape. I just free hand drew this size on a piece of foam core.
For this project to make 2 stockings, you will need the following pieces:
2 stocking body pieces facing left
2 stocking body pieces facing right
4 stocking body pieces out of your lining fabric
4 cuff pieces
2 stocking handle pieces
Breaking Down the Clothing
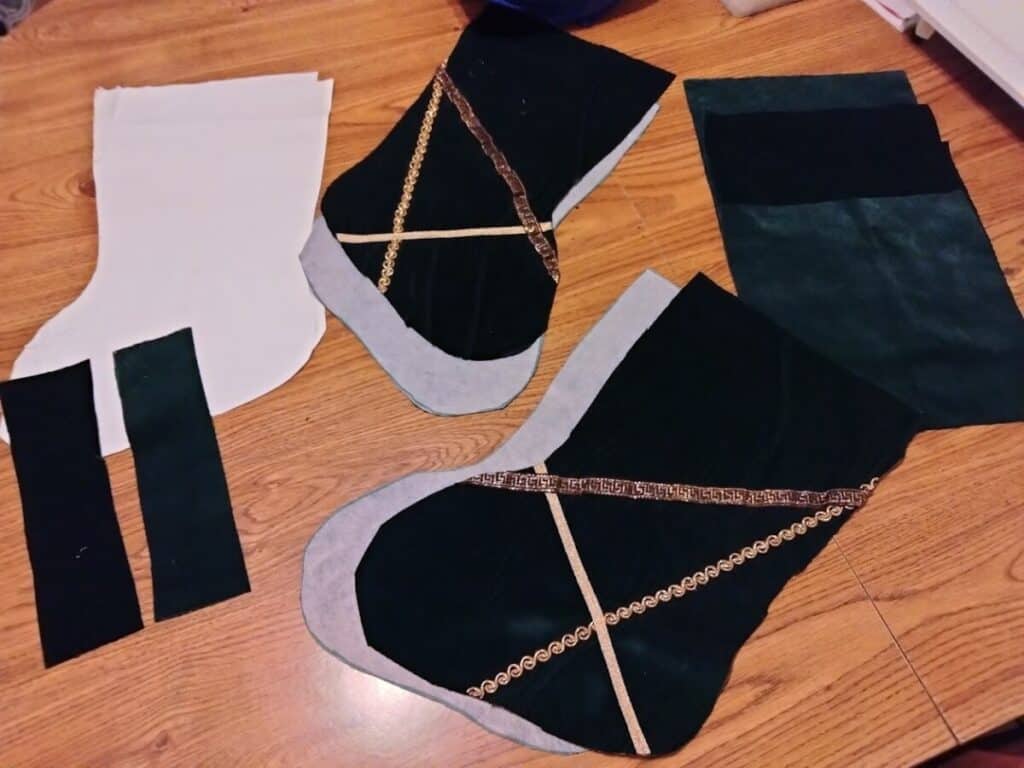
With this project, I knew that I wanted to incorporate the criss crossed ribbons that were across the front of the jacket. I moved my pattern piece around a bunch until I found the perfect layout that I loved.
In this project, I am making two stockings, so I decided to have one face to the left and one face to the right.
Once you know where you want your pieces to be cut, we need to break down the clothing, so it is easier to work with. I have found the easiest way to do this is to follow existing seams.
My first cut was to take off the band that went along the bottom of the jacket because it made a gathered edge, and by removing it the fabric would lay flat.
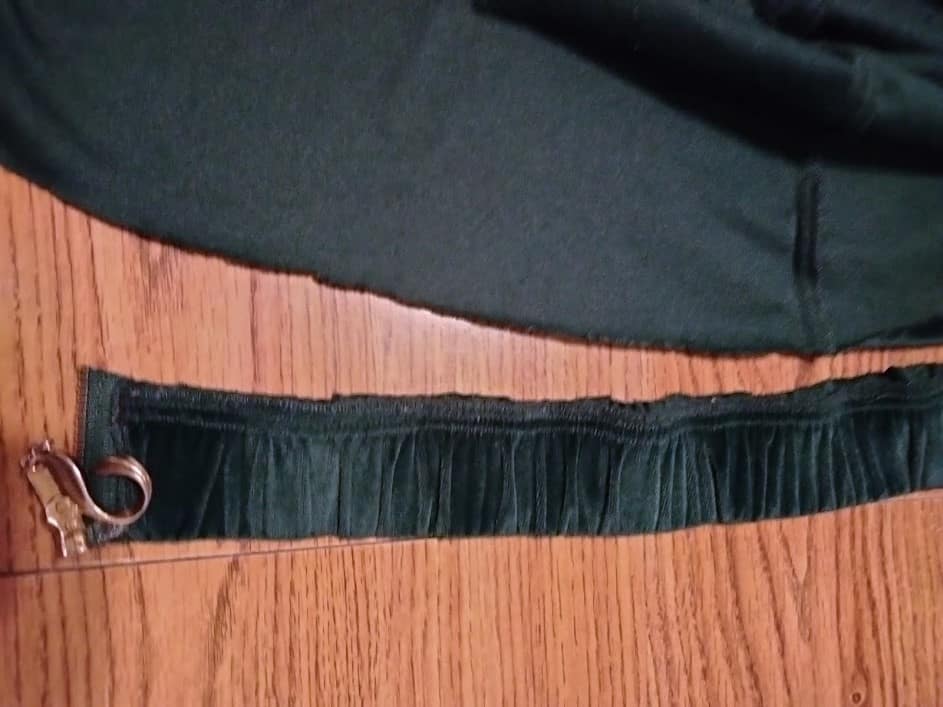
While we are breaking down the clothing into smaller pieces, we don’t have to be super neat. We just want to have pieces that lay flat so we can use our pattern without hitting edges or overlapping pieces.
Next, I went up the side seams of the jacket to remove the left and the right panels and to have a separate back section.
I also cut along the edge that held the sleeves on, and then cut up the middle seam of the sleeves to have another section that will work for cuff pieces.
Once I had the jacket cut into smaller sections it was so much easier to get them to lay flat. Now I just needed to iron on the interfacing.
I took each section and cut a piece of interfacing larger than my pattern pieces. I put a few pins in the corners to keep it in place, and then used an iron to set the interfacing.
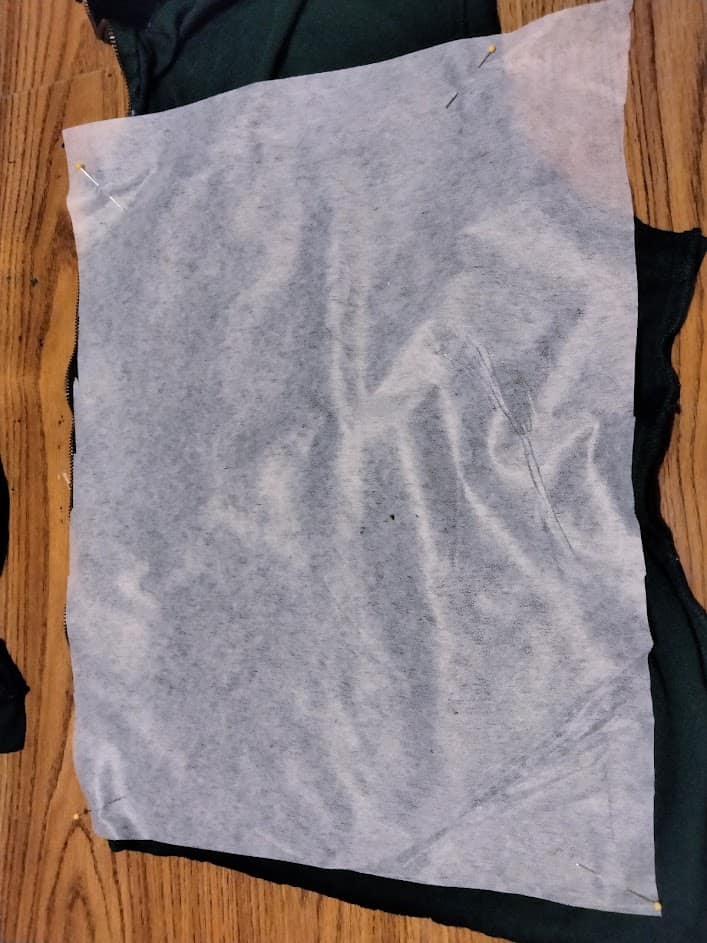
If you have never worked with interfacing before, there is a right side and a wrong side. The right side is smooth and is the part that the iron should touch.
The wrong side feels bumpy and is basically covered with little, tiny drops of glue. Do not iron the side that feels bumpy! This can ruin your iron by melting all over the iron’s face and cause a mess.
I always triple check that the smooth side is on top before I iron it on just in case!
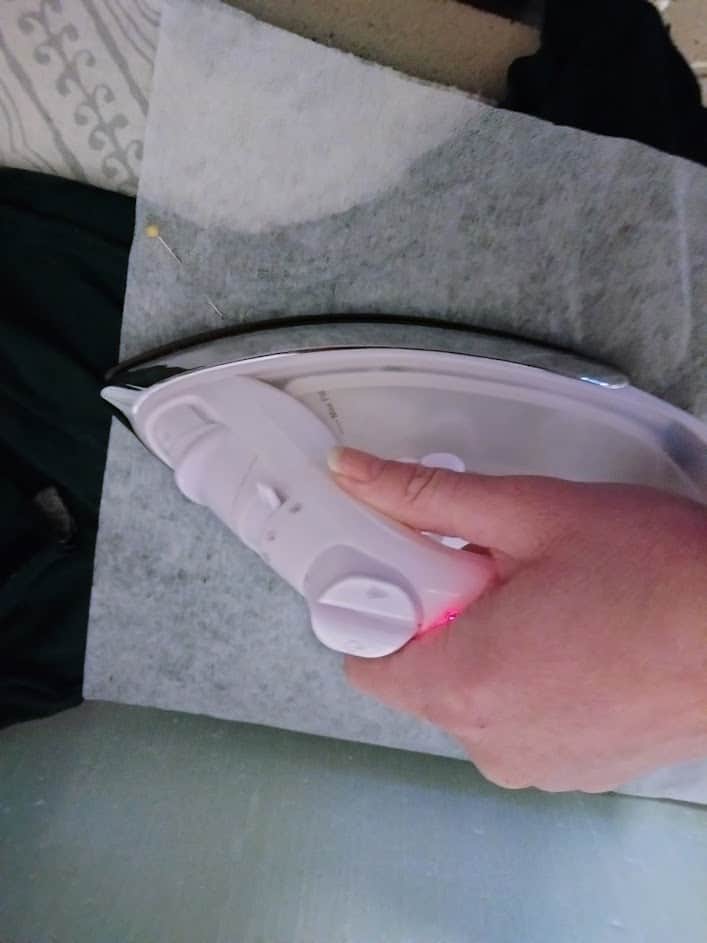
With the velour fabric the interfacing attaches very quickly so I worked left to right with my iron and let it sit for just a few seconds. Then I moved next to it and repeated this all the way across the clothing section.
You will know when the interfacing is set because it will change color slightly and will be fused with the fabric. If you can still move the interfacing, it is not fused yet.
If you have never used interfacing on this type of fabric, I would test a small section to see exactly how long it takes to fuse.
Interfacing is a must have if your fabric is stretchy like a knit or a cotton t-shirt. It also will add some stiffness to really light weight polyester fabrics like thin button up men’s shirts.
Cutting out your Pattern Pieces
Once all your fabric sections are prepped with interfacing, you are ready to start tracing your pattern pieces.
Another benefit of the interfacing is that now you can use a marker to trace your pieces, so it is really easy to see where to cut them out.
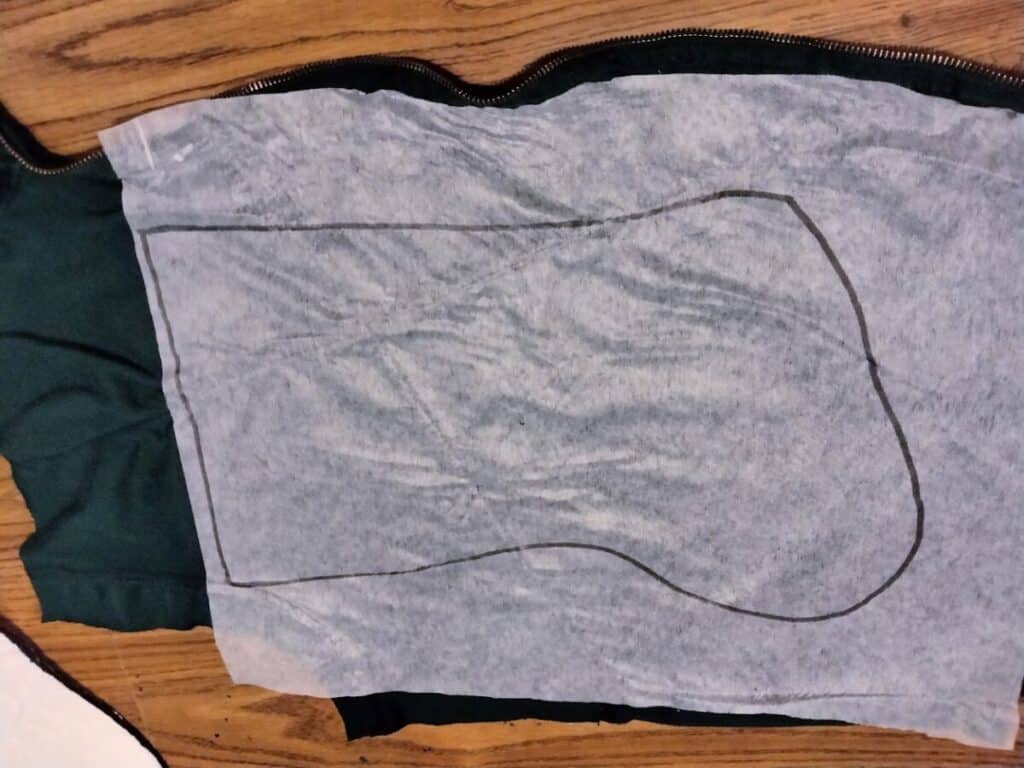
Since I knew that I wanted the stockings to face different directions, I had to make sure that when I was cutting the pieces out that I had one stocking facing left and one stocking facing right.
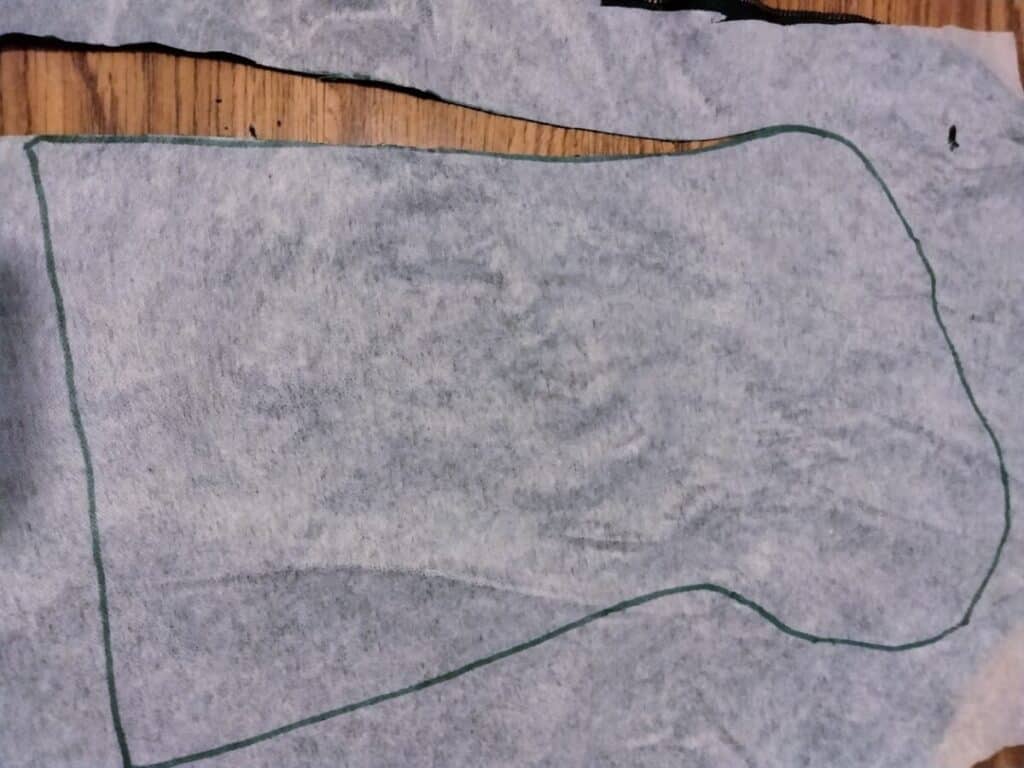
For the back sides of the stockings, I wanted to just use the plain back side of the jacket, so I made sure to cut out 1 left facing stocking and 1 right facing stocking.
I always start out with the stocking body pieces first since those are the biggest pieces and are a little harder to fit. Once I have traced those pieces, I go ahead and cut them out.
Now we need to look at what is left of our clothing sections to cut out 4 pieces for the cuffs. I purposely cut the stocking pieces out of the back with a lot of room in the middle, so I knew I could get a cuff piece there.
You will notice that the section I am using has interfacing that overlaps or comes really close together. This is totally fine to do. Interfacing is most important on the edges where you sew, so if you have to scrap pieces together that is fine. No one will ever know. I try to use up as much of the interfacing as I can, so I don’t have a lot of waste.
To get my other 3 pieces for the cuffs, I used the opened-up sleeves. I was able to get two of the pieces out of one sleeve just by using come creative placement. Note that I pieced a little of the interfacing to match the clothing that I was working on.
Now we need the handle for our stockings. I like to use the same fabric for this part as well because I think it ties it all together really nicely. You can use a different fabric if you like. This method is completely customizable to you!
I looked over all my leftover sections of clothing and was able to find parts that would fit the handle pattern.
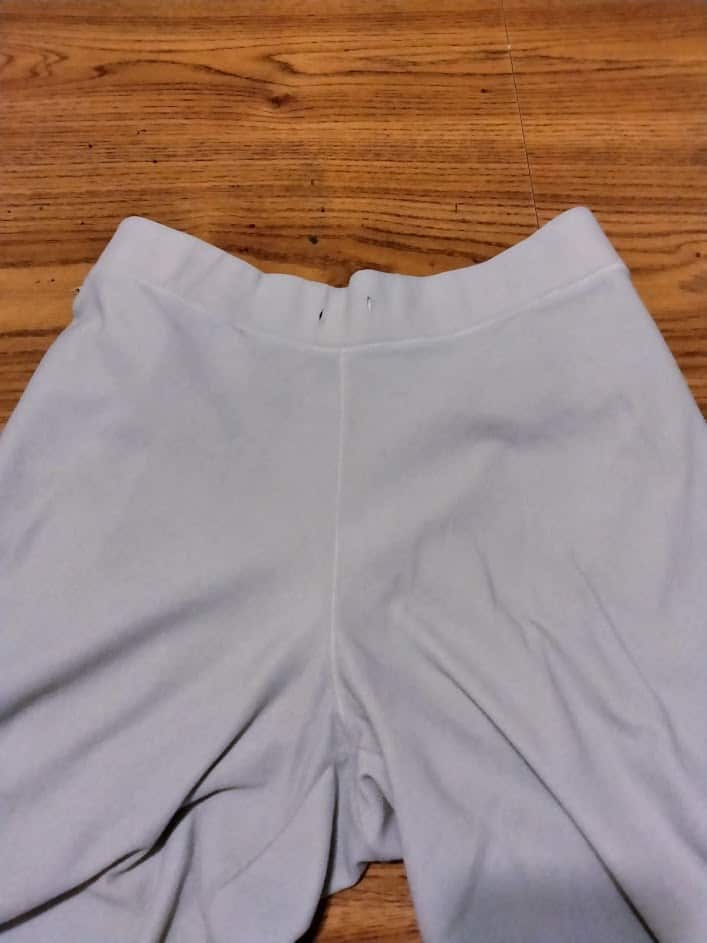
Honestly the hardest part of this stocking is making sure I have enough fabric for all the pattern pieces. I did have a pair of pants that I could use, but I like to use as much of each piece of clothing as possible.
I have also found that sometimes the wear of clothing can be different in tops versus bottoms, so I wanted to try to use just one piece, so all the fabric of these stockings felt the same to the touch.
The last pieces that need to be cut out is the lining for the Christmas stocking. I use the very basic and cheapest white cotton that I can find.
No one is ever really going to see the inside of the stocking much, so I don’t feel the need to spend a lot of money on this part.
I fold the white fabric in half length wise, and then lay out my stocking body piece. Since the white fabric looks the same on both sides, I don’t need to cut each piece out separately.
I just trace out two pattern pieces on the double thick fabric. I use a pencil for this part instead of a marker so that the marker doesn’t bleed into the white fabric.
For me it worked out better to have one facing up and one facing down. I wasted less fabric this way.
After you cut out the lining pieces, just separate the layers and you will have 2 facing left and 2 facing right.
Cut out pieces:
2 fancy stocking body pieces facing each direction
2 plain stocking body pieces facing each direction (these are showing the interfacing side up to show how they will line up with the fancy sides)
4 cuff pieces
2 handle pieces
4 lining pieces (2 facing left and 2 facing right)
Assembling the Christmas Stocking
Once you have all your pieces cut out, you have truly done the hardest and longest part! It is all downhill from here.
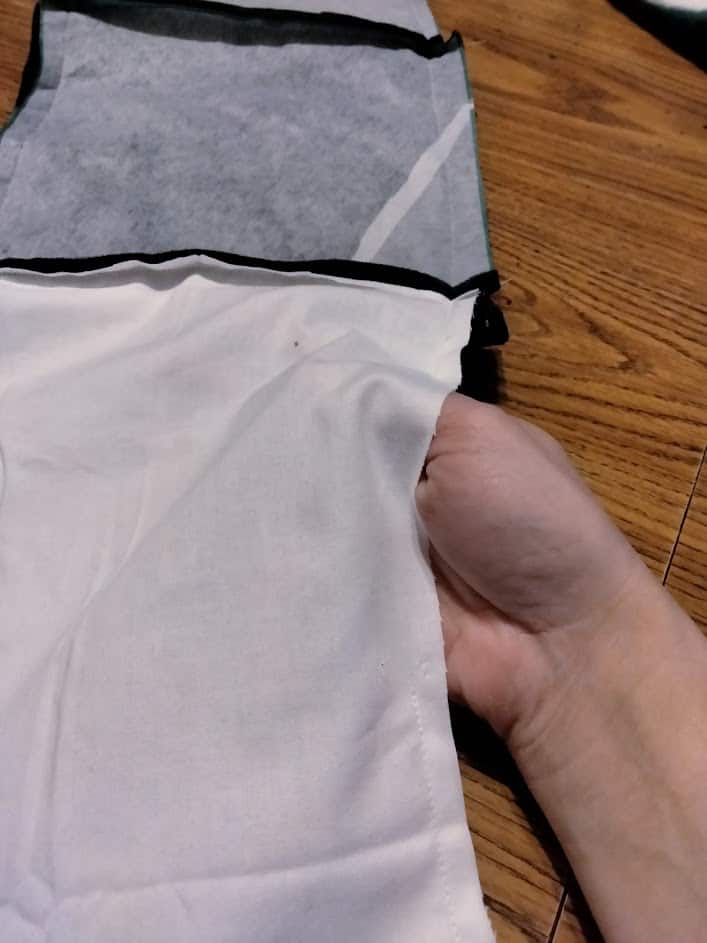
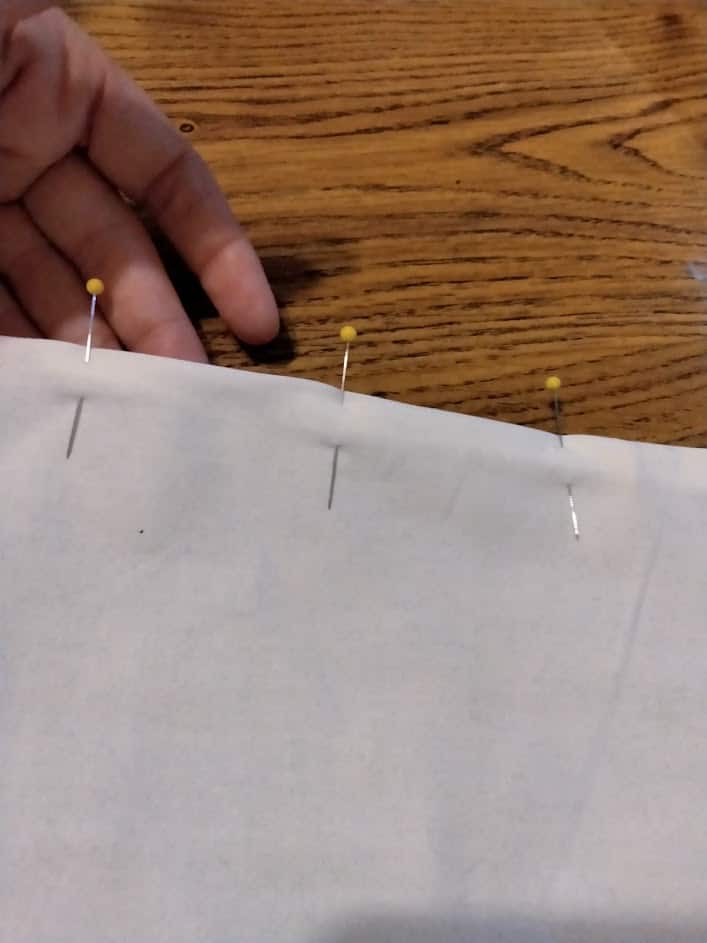
First, we are going to make each side of the stocking, so we will start with a fancy stocking body and pin it to a cuff and then pin again to a lining piece.
The most important thing to remember is that the stocking and the lining need to face the same direction, so when your side is complete it should look like this:
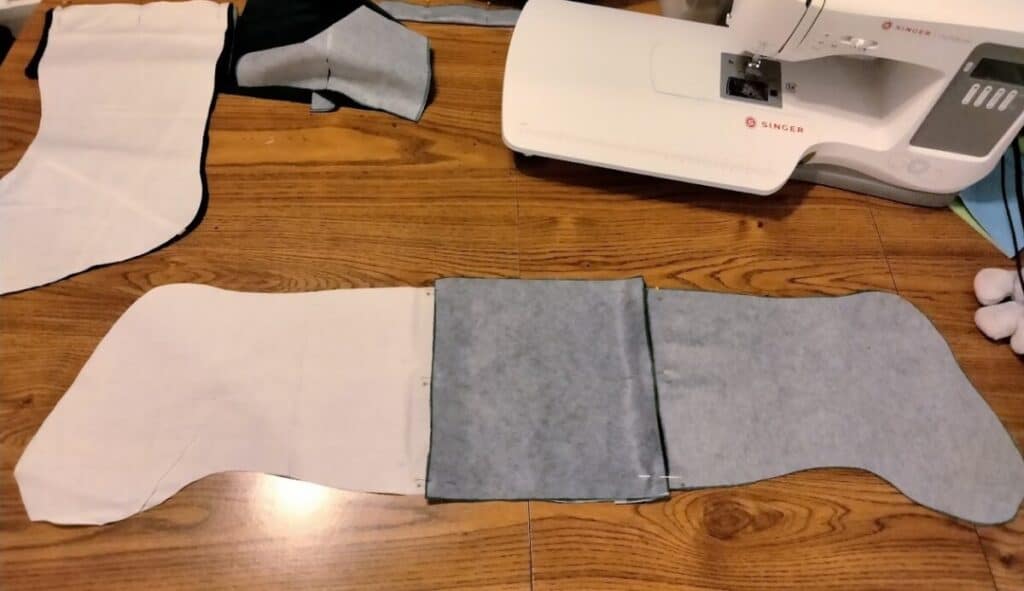
You will repeat this same process with the back plain sides of the stocking until you end up with 2 fancy fronts with cuff & lining, and 2 plain backs with cuff and lining.
I like to batch sew as much as possible, so I pin all of my pieces and then sew them all at the same time.

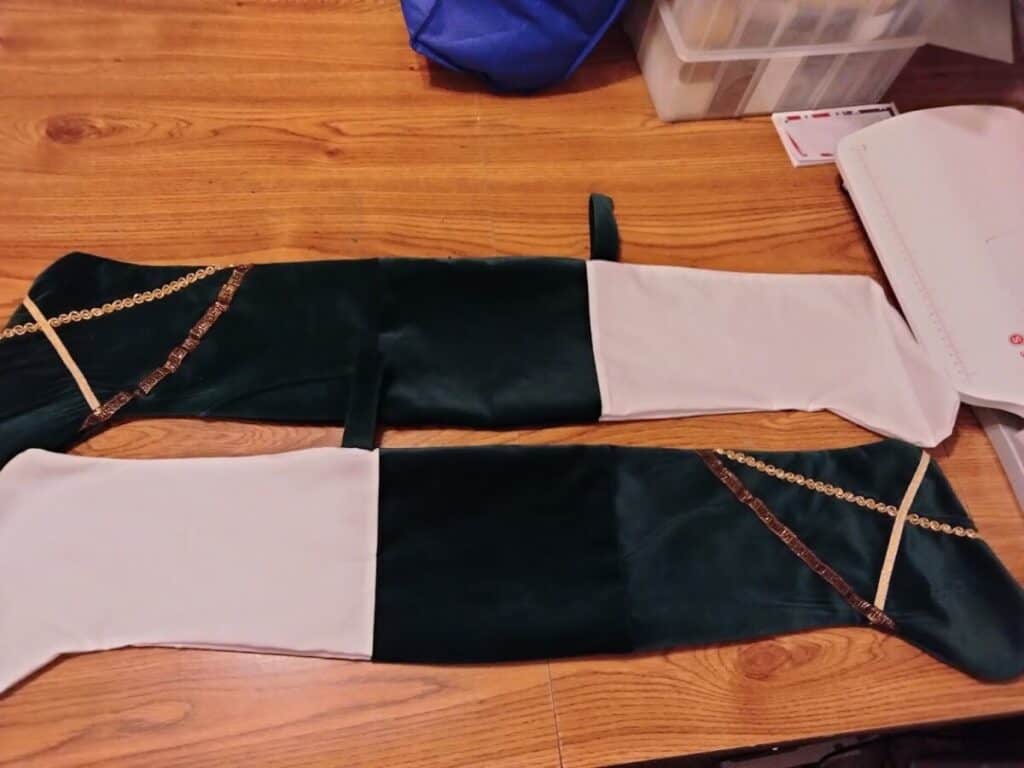
Once you sew across the cuff section to attach the stocking and the lining, your sides should look like this. For each stocking, you will have your fancy front and your plain back.
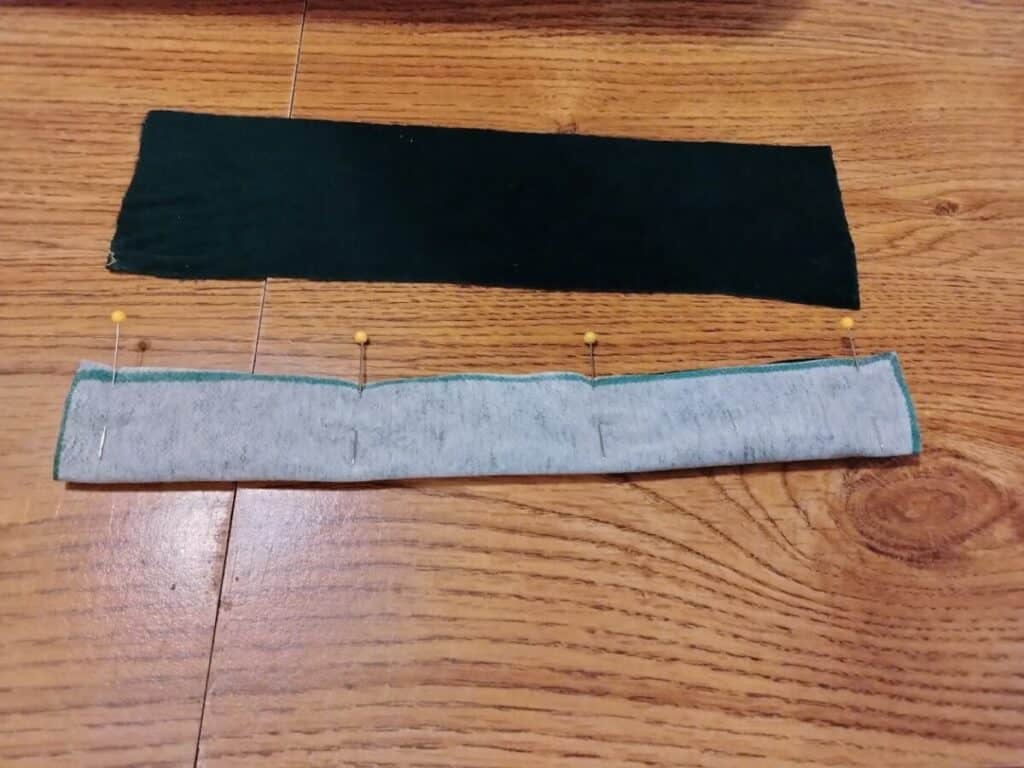
Now we will go ahead and make our handles. All we do is take our rectangles and fold them in half and then sew along the edge. I use a few pins to hold them together while I sew.
Once the handles are sewn together into a tube, we need to flip them so the green side is on the outside. I like to use a safety pin to do this.
Just hook the safety pin to the edge of the fabric and then push the safety pin up the tube and out the other side.
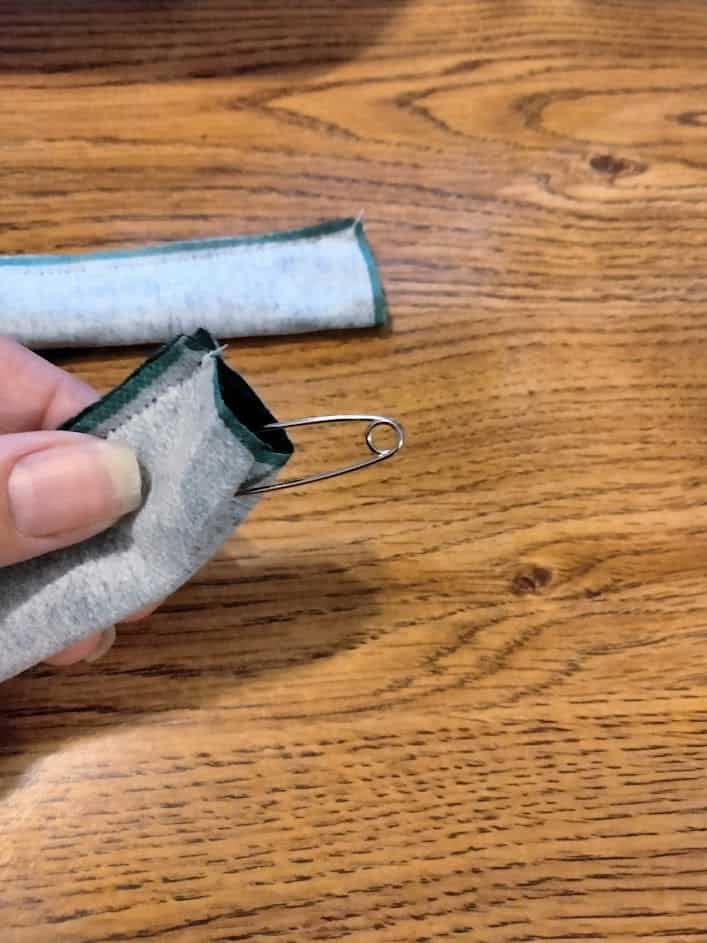
Pushing the safety pin through the fabric tube takes a little finagling with your fingers, but once you get it started, it is pretty easy to push it out the other side.
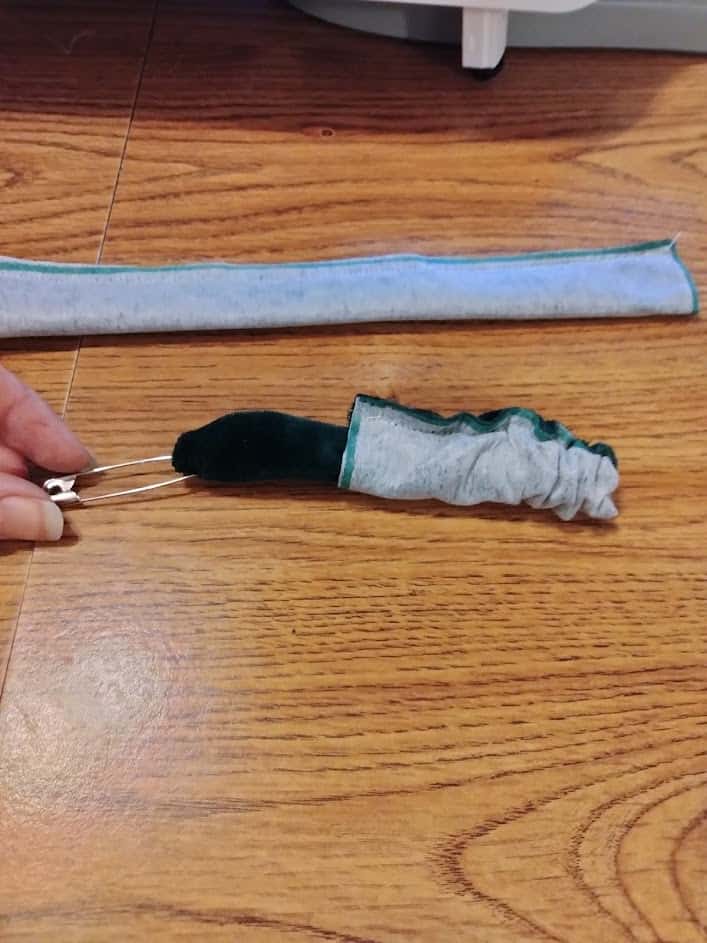
Once the pin is out the other side, your fabric should be right side out. Just remove the pin and then center the seam in the middle. I just use my fingers to straighten it out.
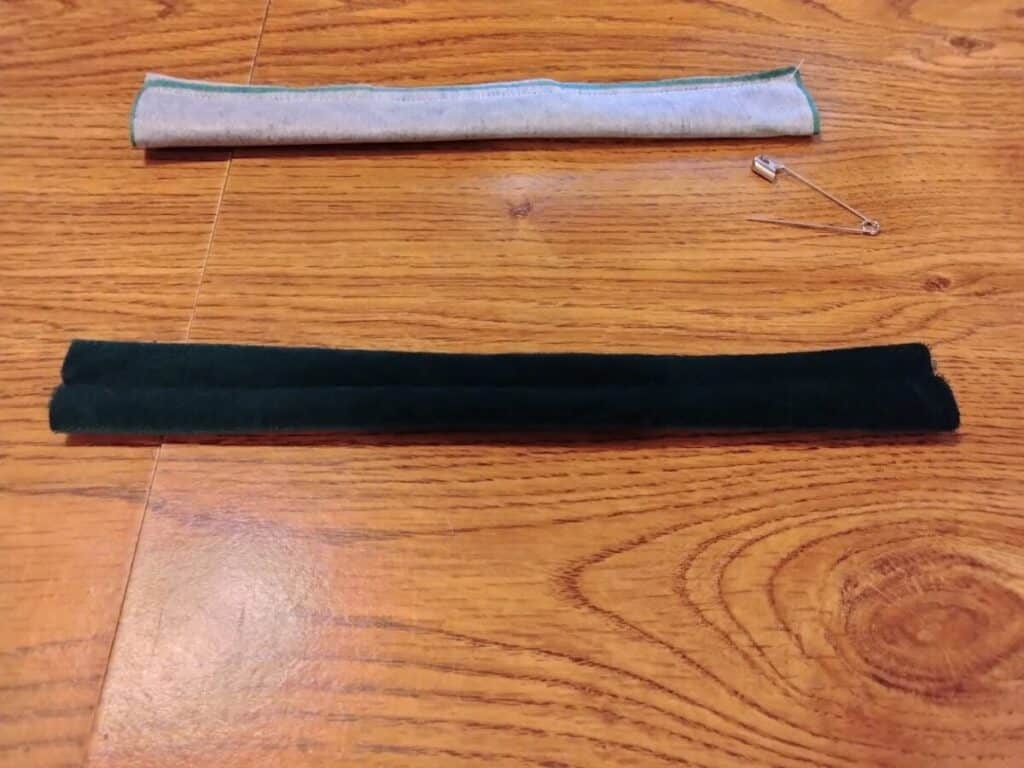
I know so far it is not really looking too much like a stocking, but this next step will really show you how this method works.
I start with my fancy side and lay it facing upward. Then I top it with a plain back side and face that down on top, so I have 2 layers facing each other.
I like to start pinning these two pieces together using the cuff seams in the center to make sure everything stays lined up.
I put the pins in the seams so that when it is sewn together, it all looks like one piece.
On the straight edge of the lining pieces is where we will place the handle. I fold the handle in half so that the seam is on the inside and then place the handle in between the 2 layers of lining.
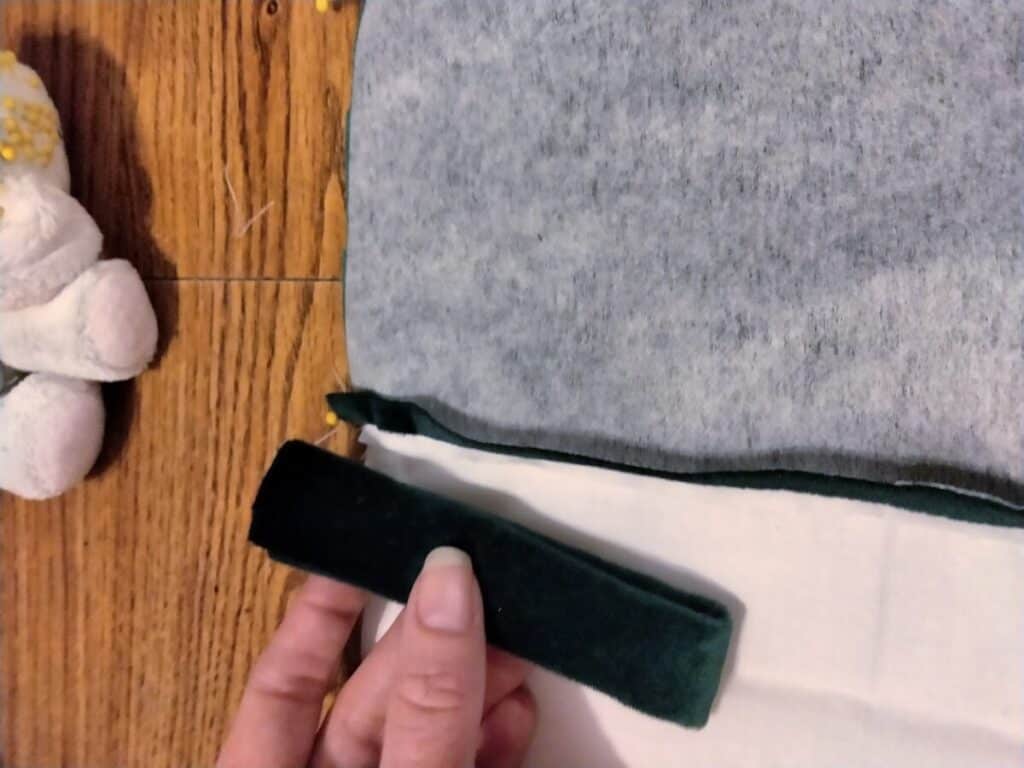
I also like to put pins on either side of the handle to make sure it doesn’t shift or move while I am sewing.
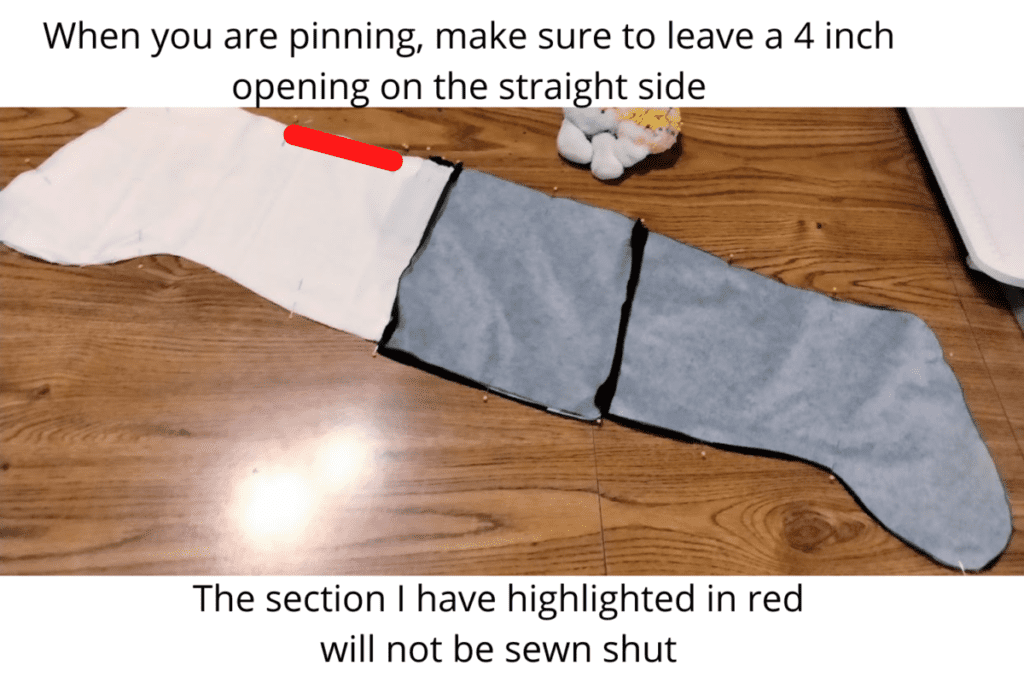
About an inch down from the handle is where I will put my opening. I like the opening to be about 4 inches wide so I can fit my whole hand and wrist inside of it to turn the stocking later.
I like to double pin where my start is and where my ending is, so that way if I have to stop in the middle of a project and come back to it later, I know exactly where I am supposed to sew, and where there should be an opening.
You can use as many pins are you feel comfortable with. When I first started I used pins about every inch along the edge. Now that I have made this pattern a million times, I usually go about 4-5 inches apart.
I like the pins to be at the curves and at the seams. This helps the stocking not shift around when I am sewing.
Once your two layers are pinned together, you can go ahead and sew all the way around the edge of each stocking.
This fabric is a little thick, so I will go really slow while I am sewing. If it is a thinner fabric or you are really comfortable sewing around curves, you can go a little faster.
Don’t forget to back stitch at either sides of the opening to make sure your stitches are locked in. I sew along the edge using a 1/4 inch seam allowance.
When I sew across the cuff, I just eyeball it to the other side so there may be a little bit more than a 1/4 of inch of fabric in the seam allowance.
Pro Tip: Why don’t I just cut the cuff pieces smaller? Every time I cut the cuff piece to 9 inches instead of 9.5 inches, I find that my pieces don’t always line up perfectly when I sew them. By making the cuff pieces just a little bit bigger, I give myself some extra wiggle room to make sure everything lines up!
Once you have sewn all the way around and you remove your pins, you can turn your stocking inside out.
This is my favorite part because I finally get to see what the final result will start to look like.
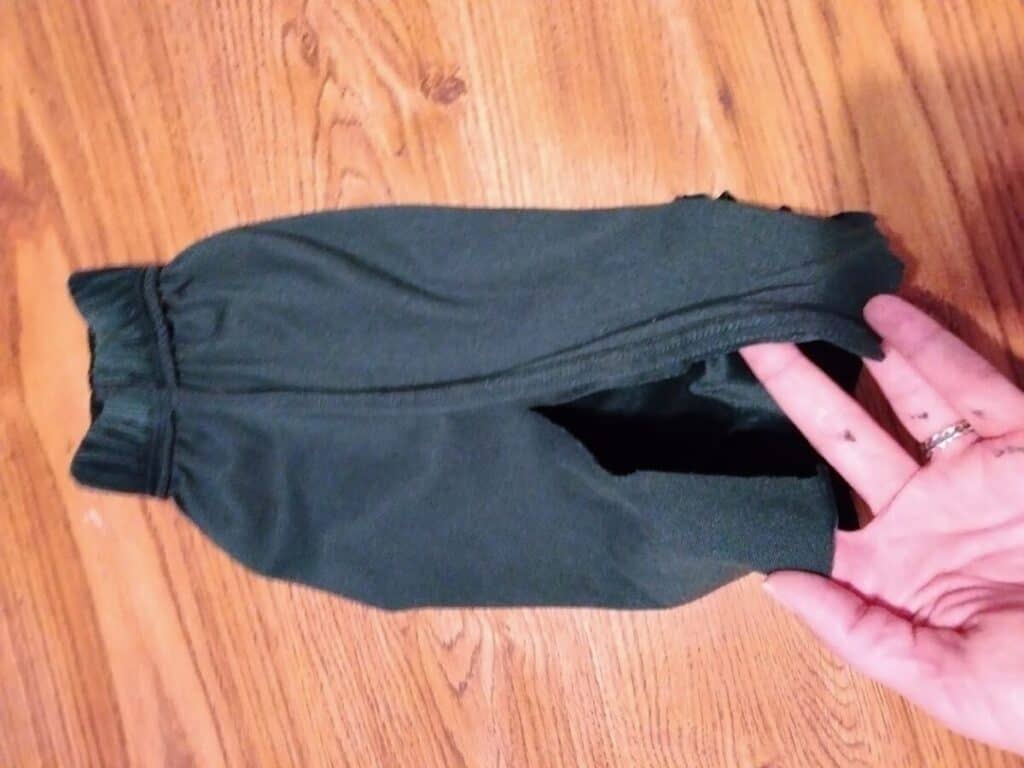
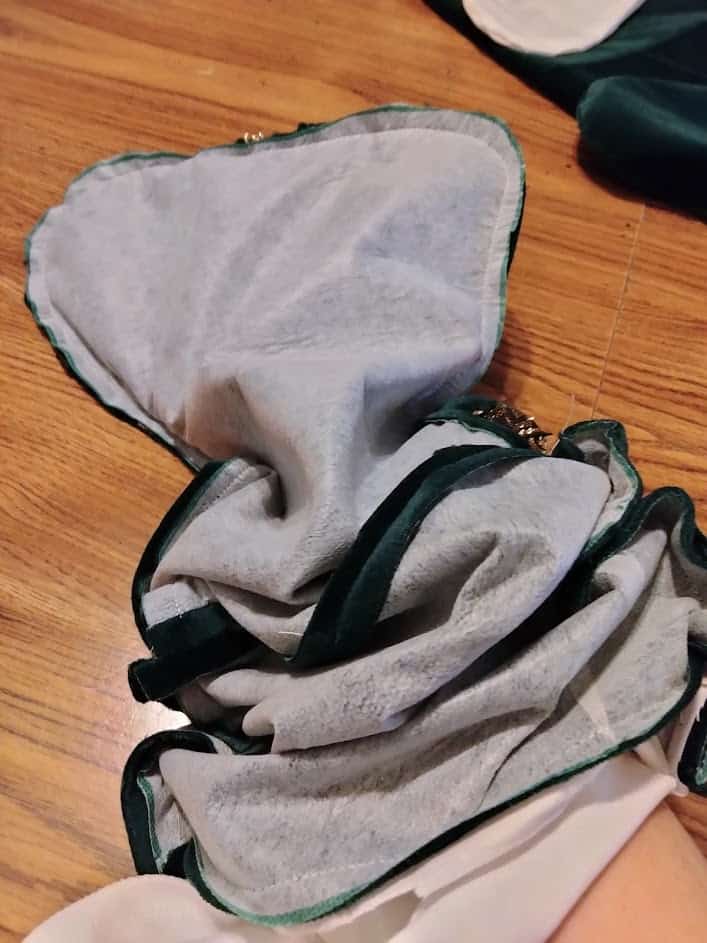
I stick my whole hand into the opening and push all the way down to the toe of the fancy part of the stocking.
I grab the toe part of the fancy stocking and pull it all the way back up and out the opening.
This reminds me of pulling a sleeve inside out when folding laundry.
Once the majority of the fabric is out of the opening, you can then run your hand along all the seams inside of the stocking (the green side and the lining side). This will help make sure that all the fabric is pulled out and able to lay flat again.
If you are using a fabric that is thin or cotton, I would suggest using an iron along the outside edge of your stocking. This will help give it a nice clean edge. If you are using a fluffy fabric like velour or velvet, ironing is not needed at this step.
Now we have to close our opening in the lining. I just fold over the edges and pin it closed, then sew as close to the edge as possible.
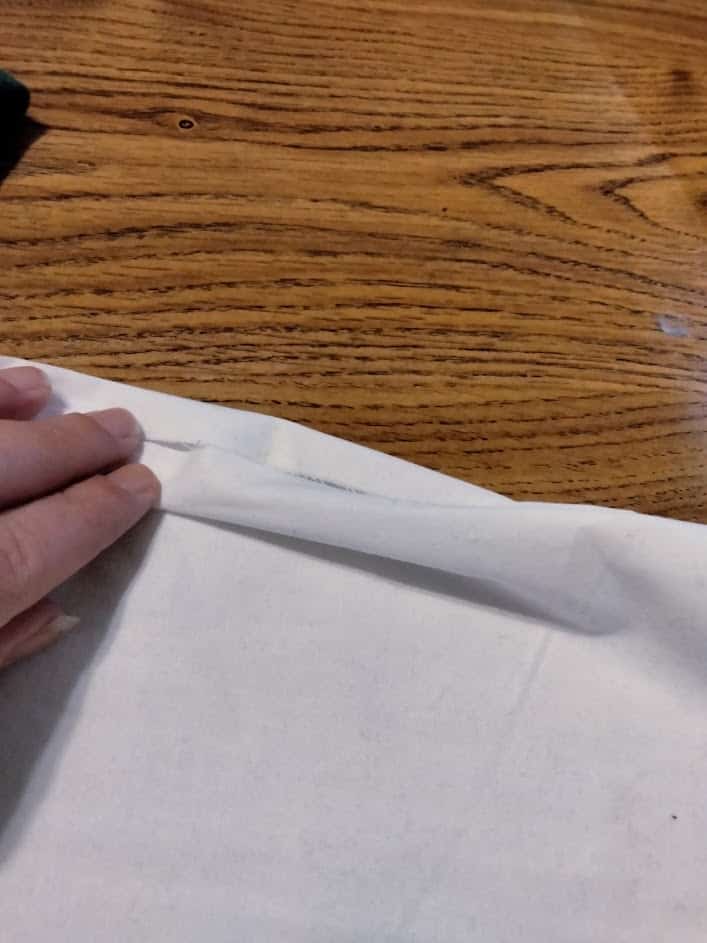
Sewing the opening closed is the last part that we need to sew on this stocking. This is what it should look like once it is done.
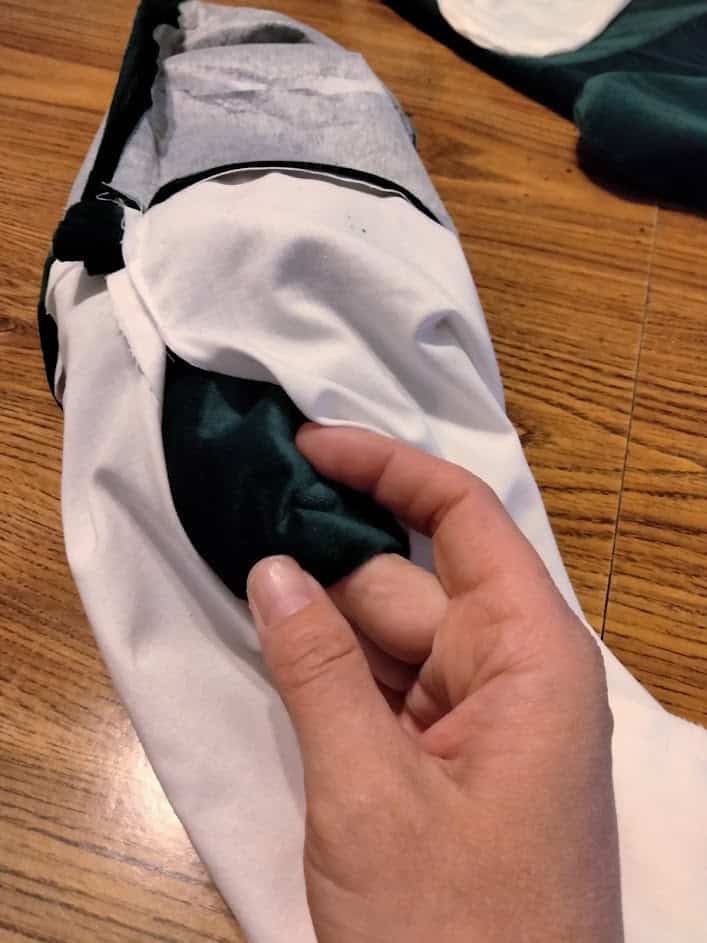
Now we just need to stuff the lining part into the fancy part of the stocking. It kind of feels like putting one sock into another sock.
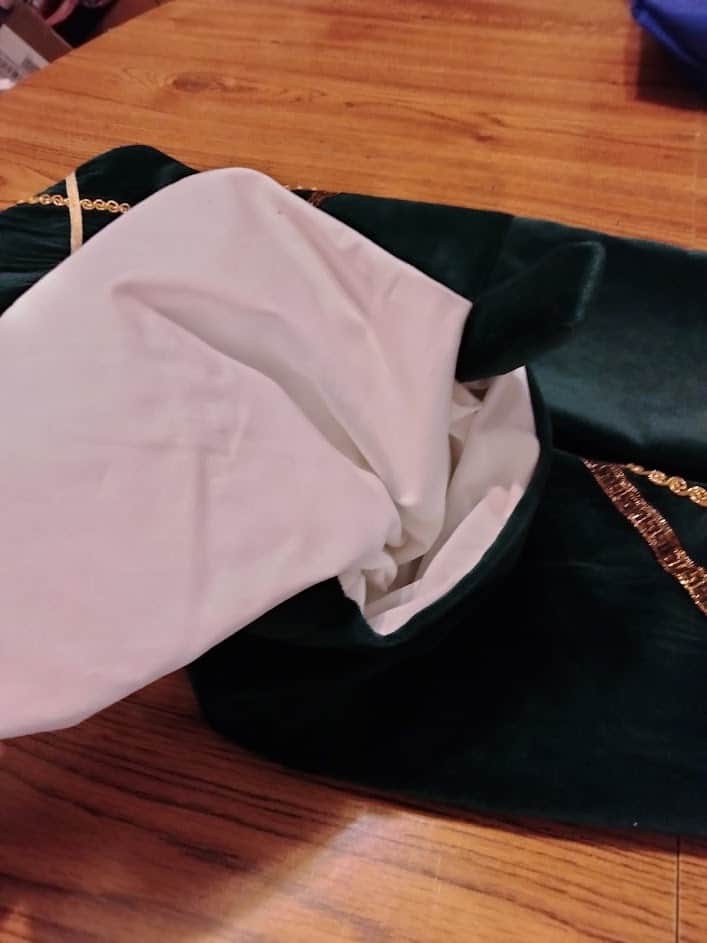
Once the lining is pushed into the stocking, I use my hand to smoothe the lining into place with the velour fabric part of the stocking. You want them to be nestled together so you don’t end up with weird lumps in your stocking.
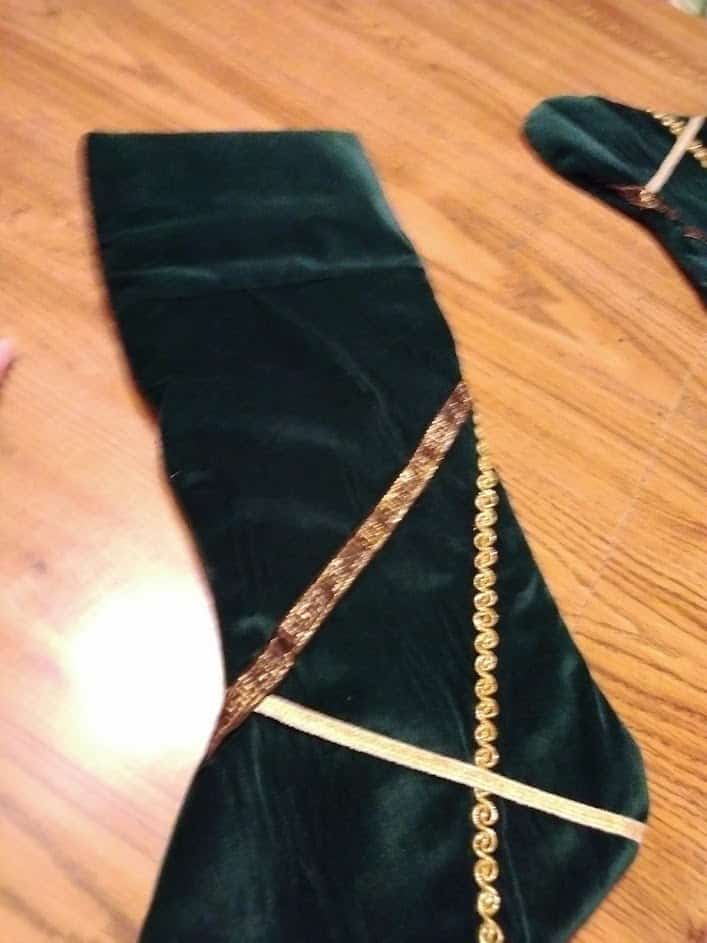
Once the lining is in place, you just fold over the cuff of the stocking! I like to let a little bit of the lining peak through and to pull the handle out straight, so it is ready to hang.

At this point you may need to just shift the stocking a little with your hands until it sits just right.
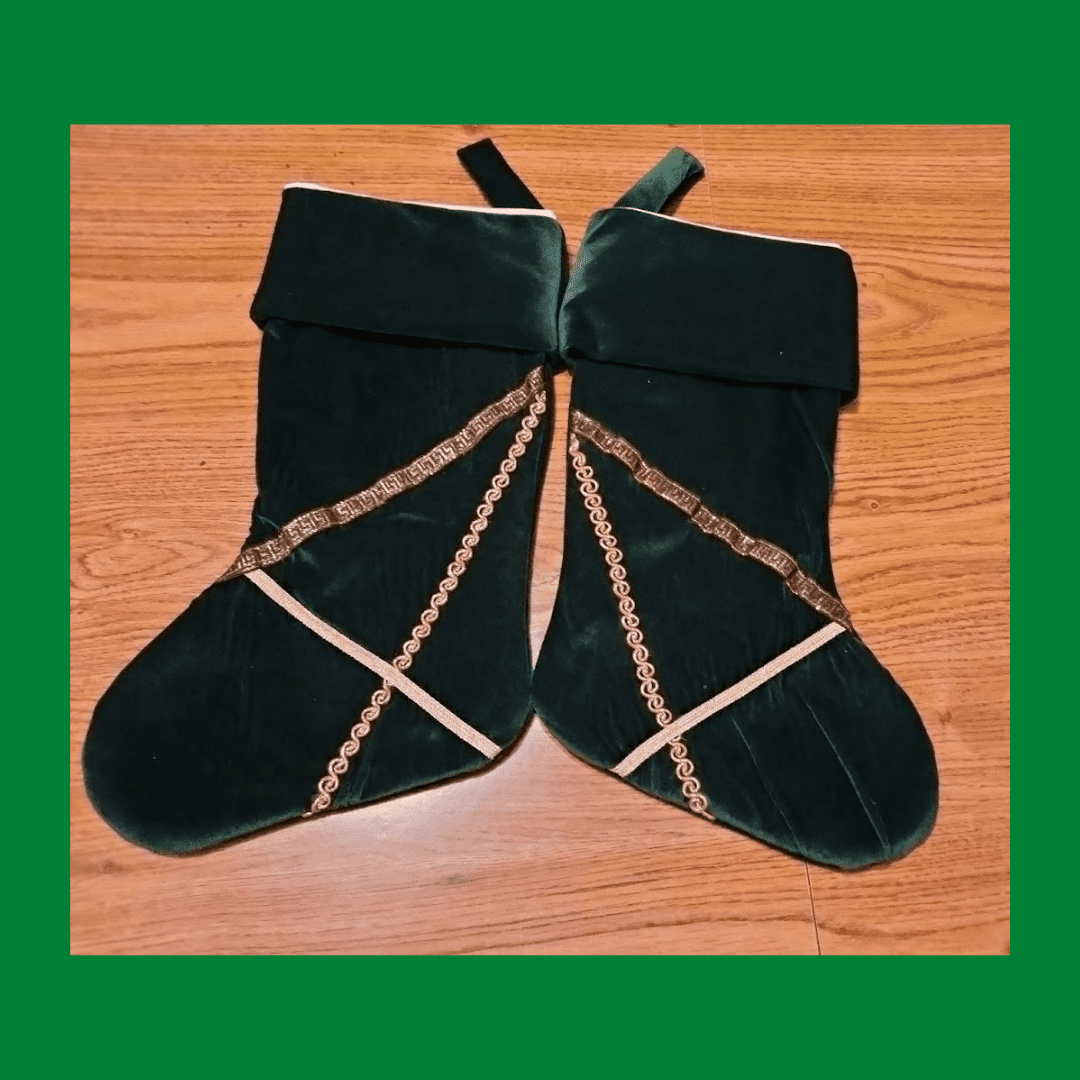
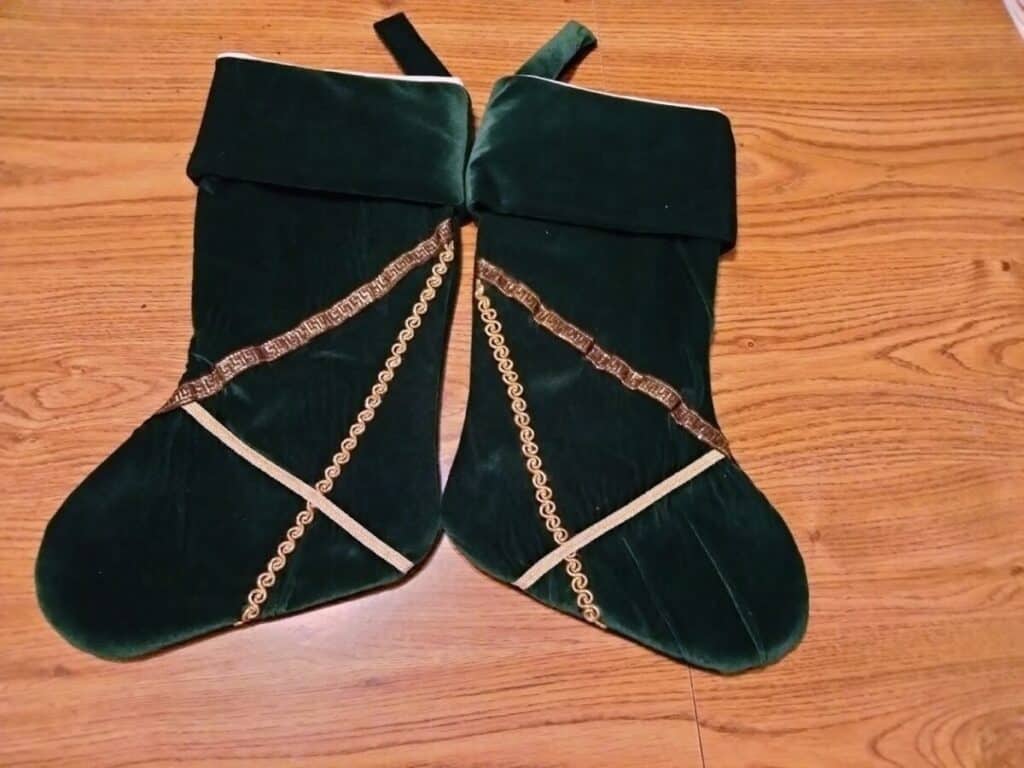
Here is our completed Memorial Christmas Stockings:
Helpful Tips for Making your Memorial Christmas Stocking
If the clothing item you are using to make the Christmas stocking is small and you do not have a lot of fabric to work with, it might want to start with a trial stocking.
I would use just any cotton fabric you have on hand or just buy some really cheap cotton that you want to practice on.
If you are using cotton fabric, you may want to use an iron to sew your seams down, so they look nice and straight. The front side of velour is very sensitive to heat, so I didn’t iron my seams. The fluffiness of the fabric made it to where you couldn’t tell that the seams were not ironed.
This is my favorite method for making Christmas Stockings because I can customize any part that I want to change. It also allows me to make the stockings in any size that I like.
I am sure that once you try this method of making stockings, that you will agree that it is super easy!
If you are looking for other fun ways to upcycle clothing, check out this project “DIY Bible Cover (Upcycling Mens Shirt)“!
If you are wanting to do DIY projects to save money, check out “Is it cheaper to make your own Curtains?“